In 4 simple steps to the perfect lawn edge
Posted on Apr 9, 2020

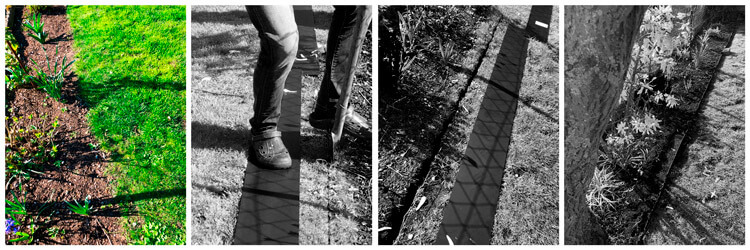
Learn how to achieve a permanent perfect lawn edge and a visually unobtrusive separation between lawn area and flower bed in 4 simple steps.
Easter is just around the corner and unfortunately the Corona virus still has us firmly in its grip, so for many the Easter holiday will have to be moved to the garden at home, willy-nilly.
However, the lawn first needs to be spruced up in spring. Of course, this also includes the annoying weeding of the flowerbed and the first mowing of the lawn. Time and again, you notice the untidy lawn edges that have grown into the bed over time. This looks unsightly and causes unnecessary work, which you can save yourself with a lawn edge barrier.
Erect your lawn edge barrier in just 4 simple steps
What exactly is a lawn edge barrier?
A lawn edge barrier is a form of root protection in which plastic panels prevent roots from sprouting from the bed towards the lawn or the lawn from growing uncontrollably into the bed. Depending on the colour and thickness of the root protection panels, a very inconspicuous yet effective separation between the lawn area and the flower bed is possible. Even inexperienced hobby gardeners can manage the work steps for erecting the lawn edge barrier and only require a little time, root protection plates and a few small tools.
Tools and aids for erecting a lawn edge barrier
- a roll of craft cord or long string and a few earth spikes
- a folding rule or tape measure to measure the length needed
- a spirit level to align the string and the plates .
- a straight shovel or spade and possibly a hoe if the ground is hard
- a hammer, ideally made of rubber or plastic (alternatively an old rag)
- Plastic sheets as root protection sheets in the required length
Step 1 - Determine the length of the lawn edges
The first step is to think carefully about how the lawn edge should look in the future in order to determine how many root protection panels are needed for the lawn edge barrier. The easiest way to determine the length is if the lawn edge is straight, because you can start measuring the individual lengths straight away. However, if the course of the lawn edge is to be in an arc, in a circle, in curves or any other shape, we recommend laying out the desired course with a string. Here you do not have to work very precisely.
TIP:Also look for small bed islands, or tree plantings within the lawn and include these lengths if desired.
Step 2 - Cutting the course of the lawn edge barrier
Let's start with the actual work. For this you will need a spade, sturdy shoes and, depending on the size of your garden, some stamina.
Instead of digging a proper trench, which is needed for the concrete foundation, as with conventional lawn edging stones, in our case it is sufficient to kick the spade vertically into the earth. Our plastic panels are very thin with a recommended thickness of 4mm-5mm and can simply be pushed into the trenched gap. Another advantage of the low thickness is that it creates an inconspicuous separation between the lawn and the flower bed, which is hardly noticed visually.
TIP:Rock the spade back and forth a little to widen the gap. This makes it easier to insert the root protection plates.
The gap should roughly correspond to the height of the root protection plates. How high these should be, however, depends on the planting itself. Read our tips on choosing the right plastic panels below. When trenching, always make sure that the spades overlap sufficiently so that the trench has a sufficient depth throughout. To ensure that the course is perfect, a cord can be very useful, because if it is stretched along the edge of the lawn with earth spikes, you only have to orientate yourself along the cord when spading. The cord can even help with curved courses and can even be stretched as far as possible round with several earth spikes. The more earth spikes you use for curved courses, the more precisely the course of the curve can be determined.
TIP:Instead of ground stakes, you can also use simple pegs from the camping tent.
Step 3 - Inserting the root protection plates
In the penultimate step, the root protection plates are inserted. We recommend laying out the panels along the lawn edge beforehand. If thicker plastic strips are to be used in certain places, you should take care of this now so that you do not get mixed up later. Insert the root protection panels vertically from above into the gap so that the panel still protrudes about 5 centimetres above the ground. The boards can be laid butt to butt, i.e. edge to edge. However, we recommend a small overlap of about 5 cm for low thicknesses. To align the edges exactly, a spirit level is very helpful. A cord can also be effective and time-saving here. Especially if there are larger distances to be covered or your garden is a little sloping.
As a rule, the plastic strips should be inserted without any problems. However, a little help with a rubber mallet can work wonders if the floor is not too hard. Alternatively, a conventional hammer and a cloth or piece of wood can be used to protect the edge. However, it is important that the plastic strip still sticks out a few centimetres and does not sink into the ground, otherwise the desired effect of the lawn edge barrier will not be achieved.
Step 4 - Fixing the root protection panels
In step 3, we have only inserted the plastic strips and the necessary stability is still missing. You can achieve this by lightly tamping the soil on both sides of the lawn edges with your feet. When doing this, always make sure that the plastic panels do not curl, even if this is only of a purely optical nature. This can happen if the thickness is too low. Here you can again use a hammer to further compact the soil in the wavy areas and thus straighten the course.
Even though the side facing the lawn may now look a little unsightly because the lawn does not quite reach the lawn edge barrier, there is no need to worry. After a short time, the lawn has recovered and grown completely and densely up to the new lawn edge. Alternatively, you can help it along and sow a few lawn seeds to enjoy a perfect lawn edge more quickly.
Last but not least, you can fill the flower bed back up to the lawn edge barrier with potting soil, mulch or gravel or plant it with colourful flowers.
What are the advantages of a lawn edge barrier?
Advantage 1 - The lawn stays where it is
The essential aspect of a lawn edge barrier with root protection panels is that the lawn no longer spreads uncontrollably into flower beds or planting islands and the roots of ground covers and shrubs also do not sprout into the lawn area.
Advantage 2 - Mowing the lawn saves time
Lawn edge barriers save time, because the lawn edges are now much easier to cut with a lawn edge trimmer. There is no need to fear that the plastic panels will be damaged in the process. In addition, the edge also serves excellently as a boundary for the lawn for robotic mowers. This also has the positive side effect that the robot does not accidentally mow the first spring flowers in the flowerbed.
Advantage 3 - Everything stays where it is
Due to the clean separation, the mown grass is not swirled into the flower bed, which would have to be collected again later for a flawless appearance. In addition, mulch or gravel is not picked up by the lawnmower and spread across the lawn. This makes the garden look neater and tidier and saves a lot of unnecessary work in the future.
How do I choose the appropriate root protection panel?
A big advantage of plastic panels is that they can be ordered already cut to the right size. In addition, plastic panels are flexible and sufficiently stable as a pure lawn edge barrier with a thickness of 4-5mm. This is particularly practical for curved lawns or tree borders, because the panels are flexible due to their low thickness.
- In principle, all UV-resistant plastic sheets are suitable as root protection sheets
- Plastic sheets made of polyethylene are not only extremely inexpensive but also weatherproof
- Black plastic sheets are particularly inconspicuous in the soil
- For pure lawn edge barriers, a thickness of 4mm-5mm is sufficient
- The height of the plastic strips as root protection panels should be around 20-25cm
- Do not use plastic sheets with a foamed core as these are too unstable
- Plastic sheets made from recycled material also serve their purpose excellently
- Purchase your plastic sheets directly cut to size, so you save time and money
The height of the plastic sheets is ideally 20-25 cm, but should be adapted to the planting in the bed, because depending on how the bed is planted, a greater height or thickness can also be recommended so that the roots cannot sprout below the lawn edge barrier towards the lawn surface. This is particularly useful for shallow-rooted plants such as bamboo, ground covers or some shrubs and can save a lot of work in the long term. In road construction, black polyethylene sheets are even used to limit the roots of trees in order to prevent road damage. However, the thickness used here is often between 10mm and 20mm.
We wish you happy Easter days and lots of fun with your gardening!