
Install aluminium construction profiles - The complete installation guide with images
Posted on Jun 1, 2026
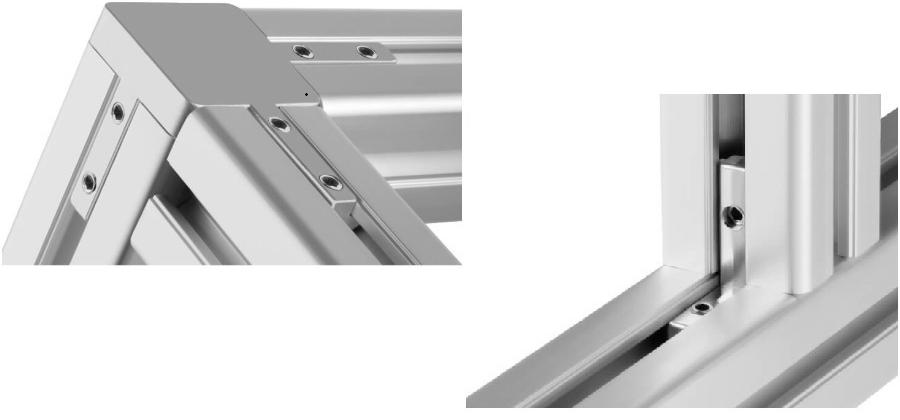
In this guide, we show step by step how profiles are connected, extended and correctly assembled with hinges, connectors, levelling feet, castors and other accessories.
Installing aluminium construction profiles is comparatively simple with the right profile system and accessories. Thanks to the continuous slots, profiles can be connected with corner connectors, profile connectors and slot nuts to create frames, stands, doors, workbenches, machine constructions or mobile structures.
In this blog, we show step by step how aluminium construction profiles are planned, cut, connected and extended. You will also learn how to install hinges, levelling feet and castors, which panels are suitable as infills and which mistakes should be avoided during assembly. Suitable aluminium construction profiles and accessories are available from us to suit your project.
Installing aluminium construction profiles: planning and preparation
Before aluminium construction profiles are installed, the construction should be planned precisely. The external dimensions, later load, number and position of connections and suitable accessories are decisive. Especially for larger frames, stands or enclosures, it is worthwhile preparing a simple sketch with all required profile lengths in advance.
Profile size, connectors and the number of connection points should always suit the size, design and later load of the construction. How profile dimensions, span and load affect deflection depends on the complete construction.
Required tools
- Hex keys
- Cordless screwdriver with suitable bits
- Tape measure or folding rule
- Square for alignment
- Rubber mallet
- File or deburring tool
Cut and prepare aluminium construction profiles
Aluminium construction profiles should be cut as cleanly and squarely as possible. A precise cut makes later assembly easier and ensures that frames, stands and enclosures can be aligned accurately.
For cutting them yourself, a chop saw or mitre saw with a suitable blade for aluminium is suitable. This allows straight and clean cut edges to be produced. Profiles cut at an angle or unevenly make assembly more difficult and can later lead to visible gaps or a distorted structure.
After cutting, the cut edges should be carefully deburred and cleared of swarf. This allows connectors, slot nuts, end caps and other accessories to be installed without problems.
The simplest solution, however, is cutting to size. Our aluminium construction profiles are available in the common dimensions 20 × 20 mm, 30 × 30 mm and 40 × 40 mm as individual cut-to-size profiles. This eliminates the need to cut them yourself and the profiles can be used directly for the planned construction.
Tip: Suitable aluminium construction profiles cut to size can be ordered directly to suit the planned construction.
Connect aluminium construction profiles
Internal corner connectors can be used for right-angled constructions. They are inserted into the profile slot and secured with grub screws. This allows two aluminium profiles to be connected securely and neatly at a 90° angle.
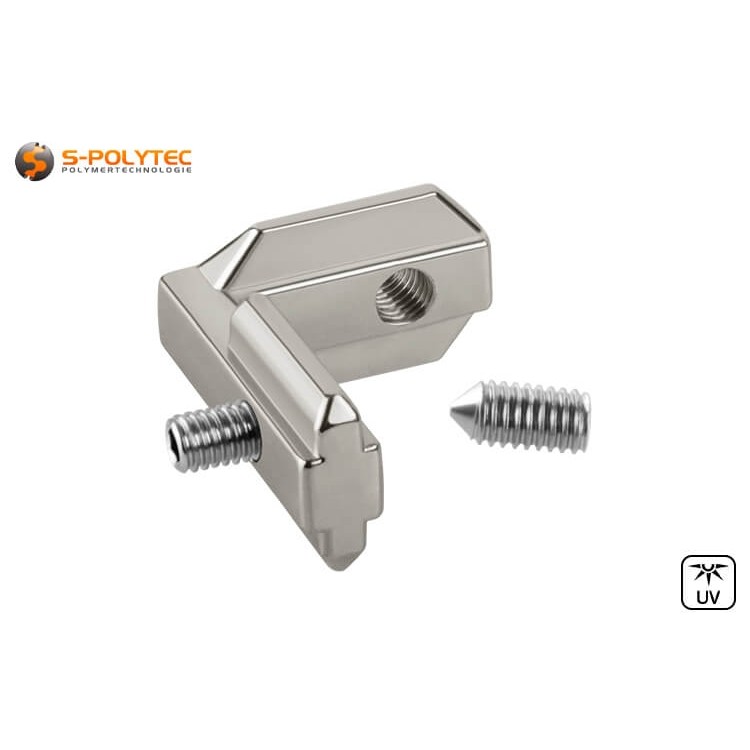
Corner connector
The internal corner connector is inserted into the profile slot and secured with grub screws.
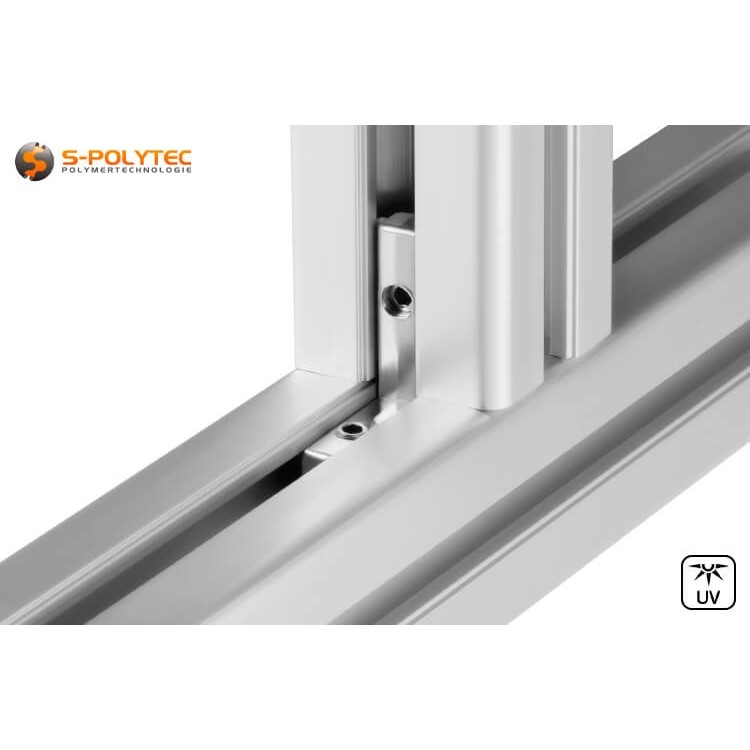
Assembled connection
After tightening, a stable and visually clean 90° corner connection is created.
Install aluminium profiles with corner connectors
- Insert the corner connector into the slot of the first aluminium profile.
- Place the second profile at a right angle onto the connector.
- Align both profiles exactly at 90°.
- Tighten the grub screws with a suitable hex key.
Practical note: Check the angle before final tightening. Small deviations at one connection can add up across the entire construction on larger frames.
Extend aluminium profiles
If the length of a single aluminium profile is not sufficient, two profiles can be connected using profile connectors. The connectors are inserted into the profile slots and secured with grub screws.
Such a profile extension is suitable, for example, for longer frames, substructures and stands. It is essential that both profiles are aligned exactly in line before final tightening.
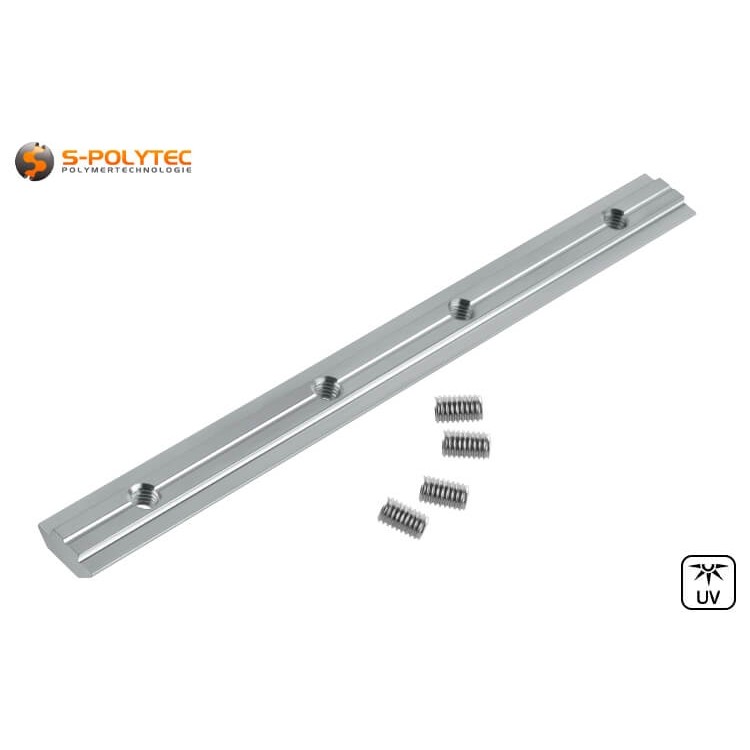
Profile connector
The profile connector is inserted into the slots of the aluminium profiles and secured with grub screws.
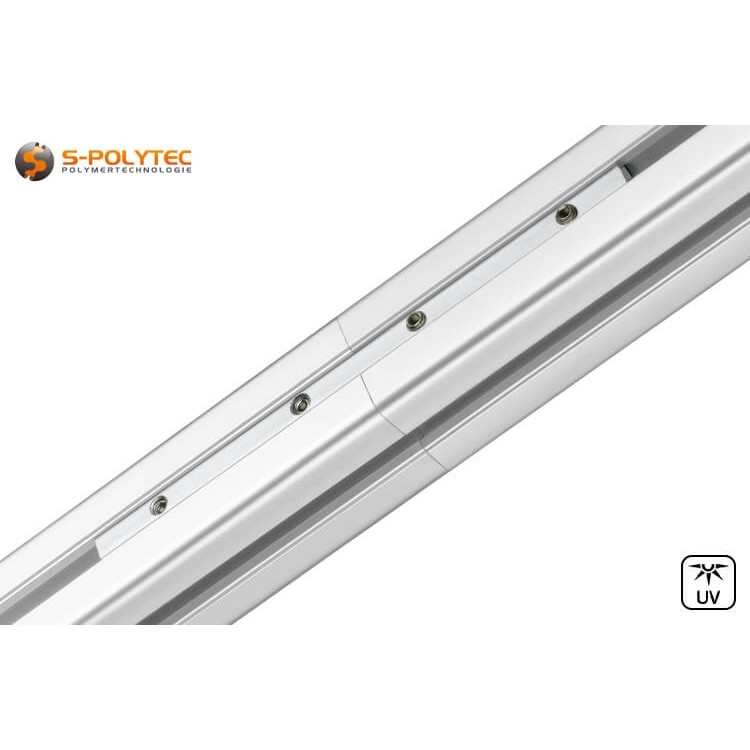
Assembled profile extension
The inserted connectors allow two profiles to be connected flush and in line.
Extend aluminium profiles with profile connectors
- Insert profile connectors into all four slots of the first aluminium profile.
- Initially tighten the eight grub screws lightly so that the connectors do not slip.
- Slide the second profile onto the protruding connectors.
- Align both profiles exactly in line.
- Then tighten all grub screws evenly.
Professional tip: For the profile extension shown here, all four profile slots should be used. This distributes the connectors evenly around the profile cross-section and allows the two profiles to be aligned cleanly with one another.
Connect aluminium profiles with 3-way corner connectors
When three aluminium construction profiles are connected at a common corner point, 3-way corner connectors are used. They are particularly suitable for stands, cube constructions, enclosures and frames with vertical corner posts.
The connector brings three profiles together at a defined corner point and therefore makes it easier to build three-dimensional frame constructions.
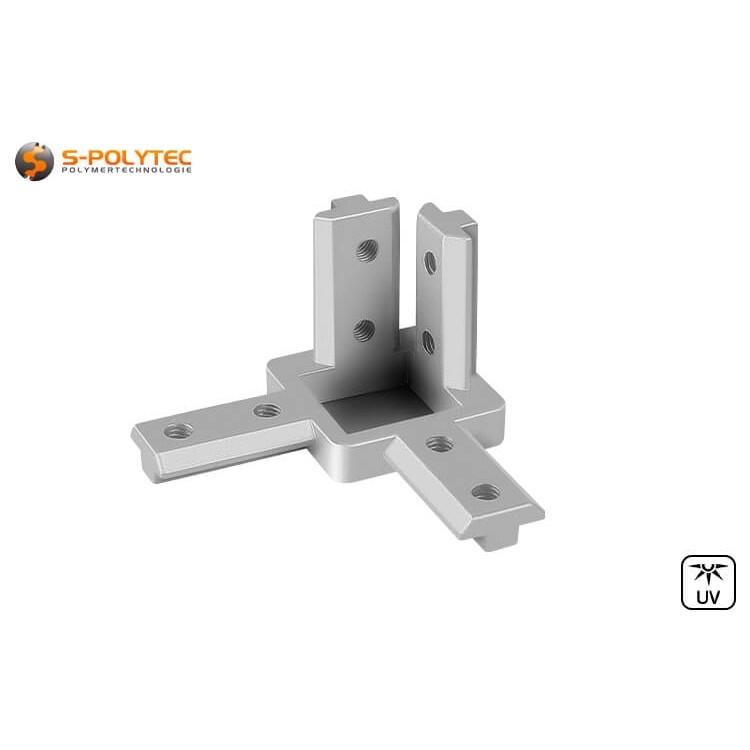
3-way corner connector
The corner connector joins three aluminium profiles at right angles.
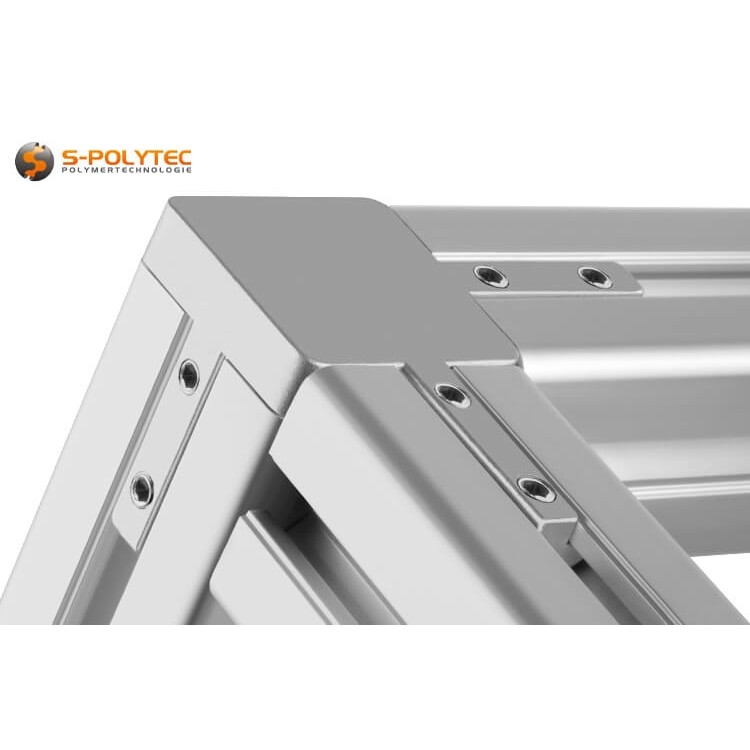
Assembled connection
After installation, the three profiles form a common corner point for frames and stands.
Installation steps
- Place the 3-way corner connector onto the main profile.
- Initially tighten the fastening screws only lightly.
- Slide the other two aluminium profiles onto the connector.
- Align all profiles exactly at right angles to one another.
- Finally, tighten all screws evenly.
Only tighten the screws after the construction has been completely aligned. This helps avoid dimensional deviations and ensures that all profiles are positioned cleanly relative to one another.
Install hinges on aluminium construction profiles
Hinges allow doors, flaps and other movable elements to be built into aluminium construction profiles. By fastening them in the profile slots, they can be positioned flexibly and readjusted if necessary.
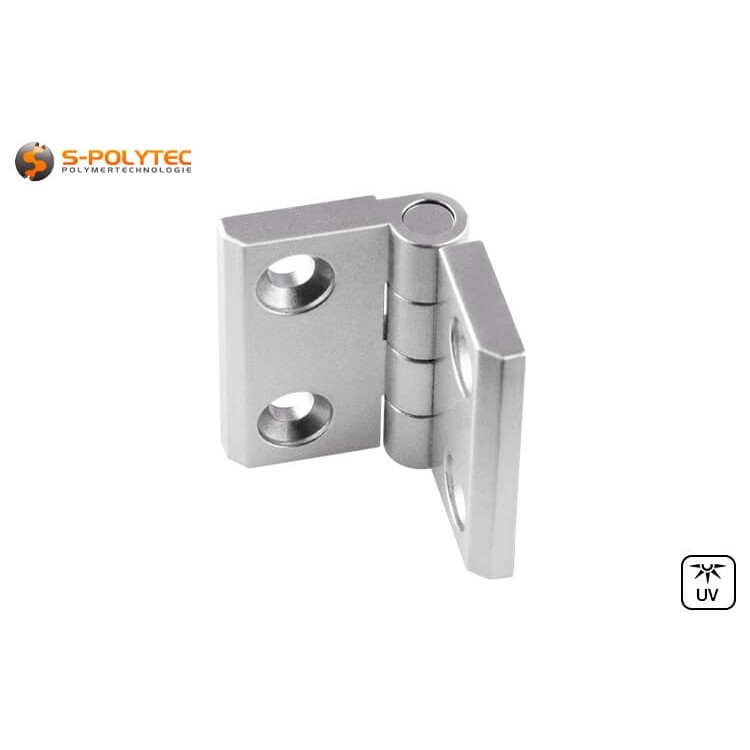
Metal hinge
The hinge is attached directly to the aluminium profile using suitable slot nuts.
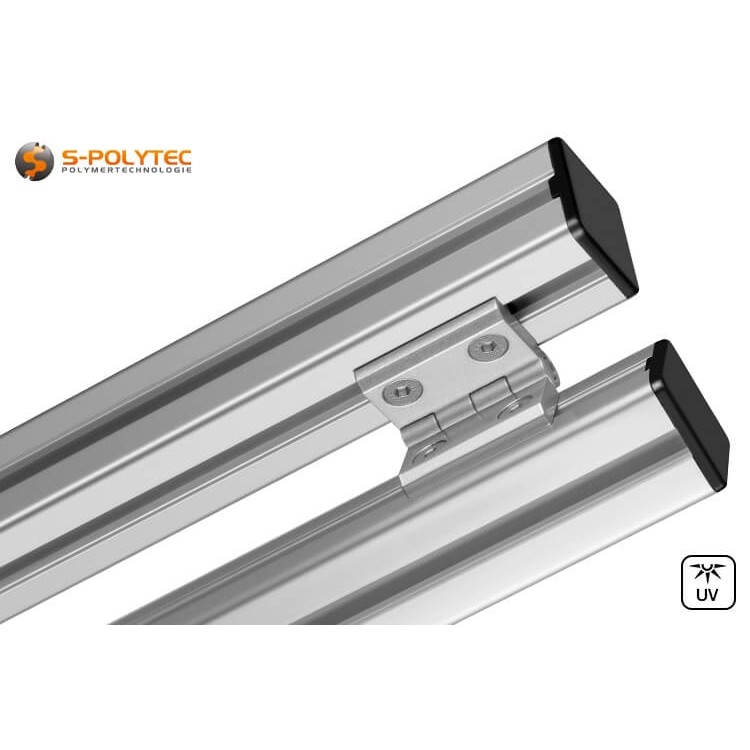
Installed hinge
After installation, the hinge connects the door frame and main construction so that they can move relative to each other.
Installation steps
- Insert slot nuts with spring ball into the corresponding profile slots.
- The spring ball keeps the slot nuts in position during installation.
- Align the hinge in the desired position.
- Fasten the hinge to the slot nuts with suitable countersunk screws.
- Tighten the screws evenly and then check the function.
At least two hinges should be used for larger doors. For tall or heavier doors, additional hinges may be useful for more even load distribution. The number and design should suit the weight and construction of the respective door.
Build doors and flaps from aluminium profiles
Aluminium construction profiles can be used to build doors, maintenance flaps and protective covers for machines, enclosures or shelving systems. The door frame is made from aluminium profiles and then equipped with hinges, handles and a suitable infill panel.
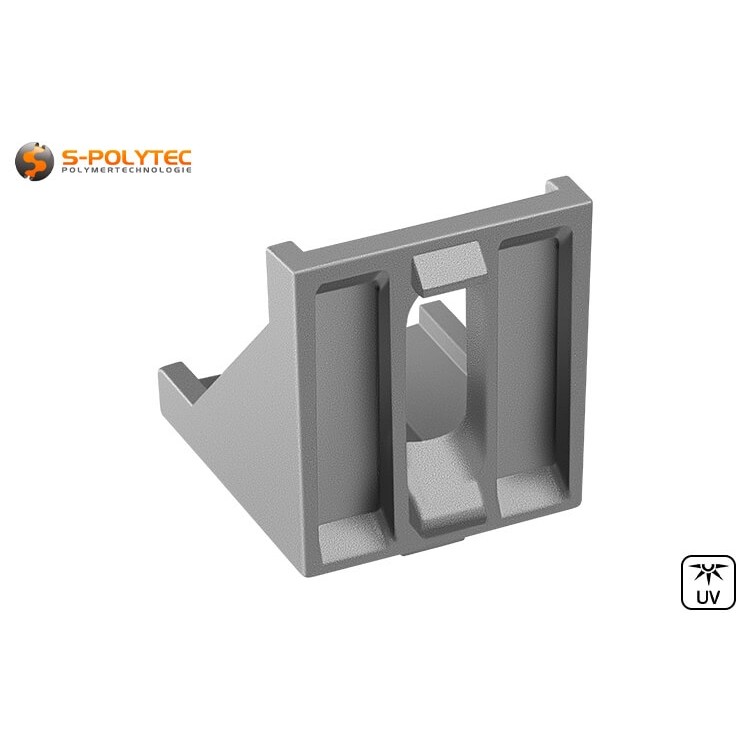
Angle connector
90° angle connectors can be used to connect the profiles into a rectangular door frame.
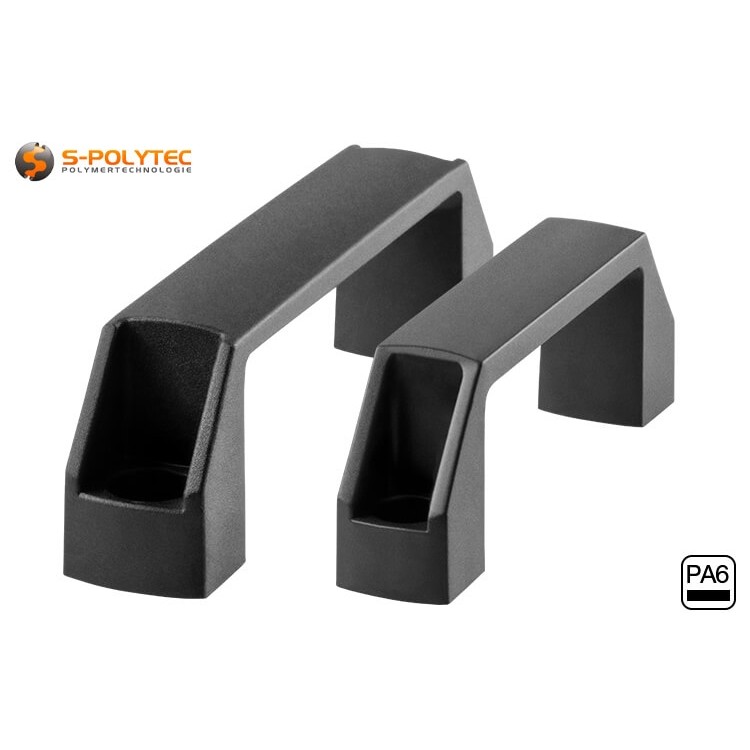
Bow handle
The handle is attached directly to the door frame and allows it to be opened and closed.
Assemble a door frame from aluminium profiles
- Cut aluminium profiles to the required lengths or order them cut to size.
- Connect the profiles with 90° angle connectors to form a door frame.
- Cut the door infill to the required size or order it directly cut to size.
- Fasten the infill in the frame.
- Install hinges on the door frame and then connect it to the main construction.
- Install the handle and check the function of the door.
Suitable panels as infills for aluminium profiles
Depending on the application, different sheet materials are suitable as door or frame infills. The requirements for weight, stability, transparency, impact resistance and weather resistance are decisive.
- Aluminium composite panels: Lightweight and dimensionally stable for cladding and technical constructions. Suitable aluminium composite panels cut to size are available with different surfaces.
- HPL panels: Robust panels for more heavily loaded constructions. Our HPL panels can be ordered to suit the frame dimensions.
- Acrylic sheets: Transparent solution for viewing windows and visible infills. Suitable acrylic sheets cut to size are available in different versions.
- Polycarbonate sheets: Particularly impact-resistant transparent infill for protective glazing and machine covers. Suitable polycarbonate sheets are also available cut to size.
Install levelling feet on aluminium construction profiles
Height-adjustable levelling feet provide stable support for stands, worktables and frame constructions made from aluminium construction profiles. Uneven floors can be compensated for and the construction can be aligned.
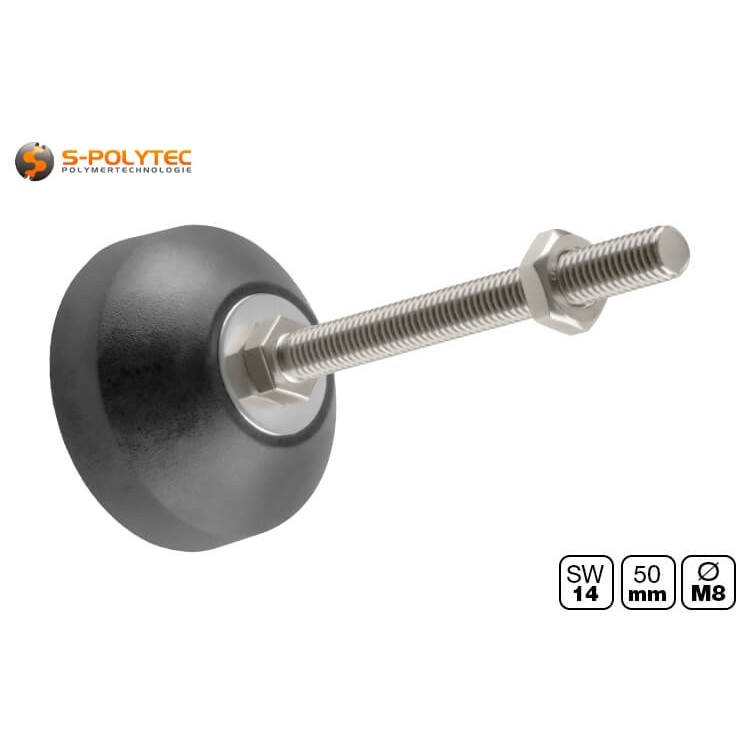
Height-adjustable levelling foot
The levelling foot is screwed into a suitable thread in the profile core bore.
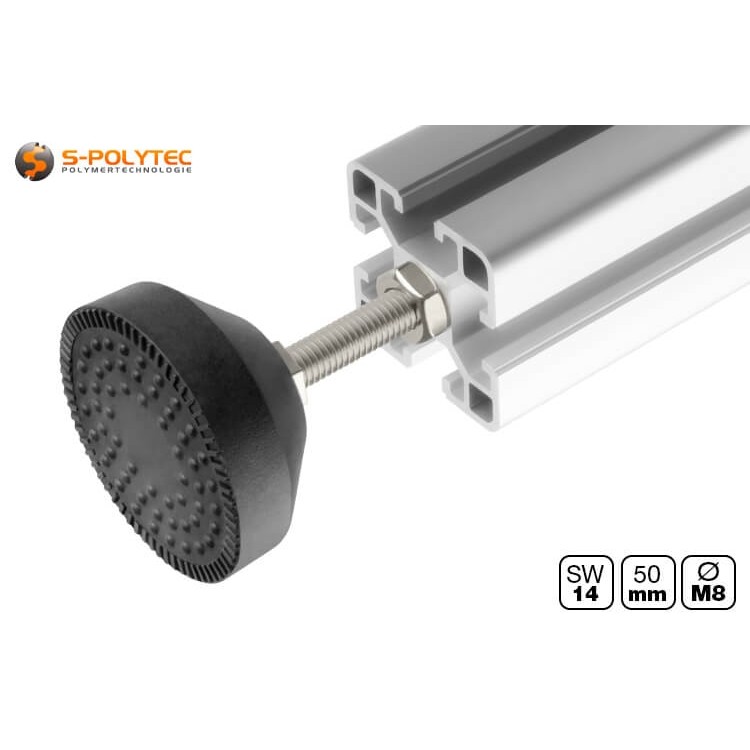
Installed levelling foot
The height of the construction can then be adjusted via the thread.
Installation steps
- Cut a suitable M8 thread into the central core bore of the aluminium profile.
- Carefully deburr the thread and remove swarf.
- Screw the levelling foot into the cut thread.
- Set the desired height.
- Tighten the lock nut against the profile so that the levelling foot cannot loosen by itself.
Practical tip: If several levelling feet are used, the construction should first be roughly aligned and then adjusted evenly across all feet. This ensures that the stand rests cleanly on the intended support points.
Attach castors to aluminium construction profiles
Castors make stands, workshop trolleys and frame constructions mobile. The versions offered by S-Polytec are available as swivel castors and, depending on the variant, can be used with or without a locking brake.
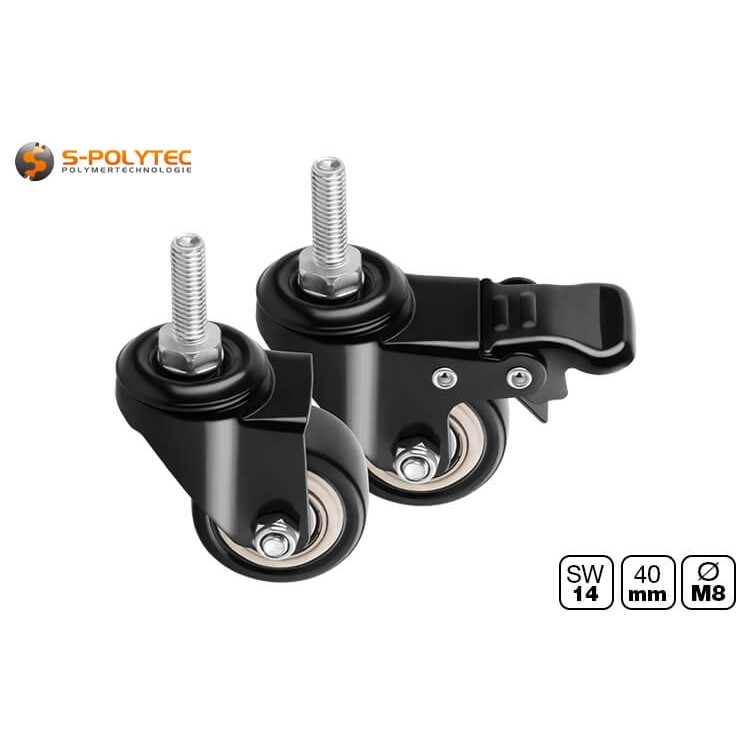
Swivel castors
The castors are available with or without a locking brake and allow mobile constructions to be built.
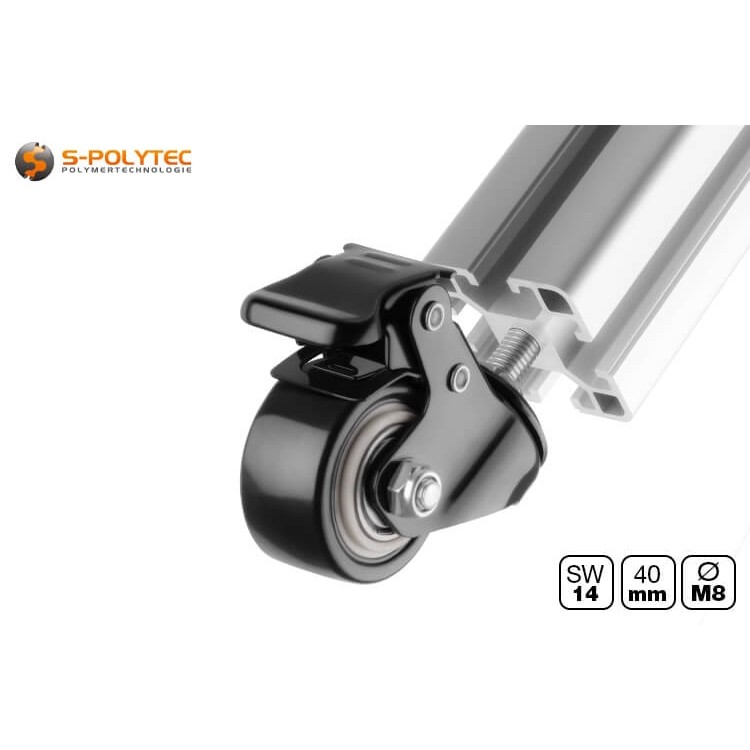
Installed swivel castor
The castor is screwed directly into the prepared thread in the aluminium profile.
Installation steps
- Cut a suitable M8 thread into the central core bore of the aluminium profile.
- Deburr the thread and remove swarf.
- Screw the swivel castor into the thread.
- Set the desired screw-in depth.
- Tighten the lock nut against the profile so that the castor cannot loosen.
Practical tip: On a mobile stand, at least two castors with locking brakes can be useful so that the construction can be secured against unintended rolling at the intended location.
Practical example: plant rack made from aluminium construction profiles
Our plant rack demonstrates how versatile aluminium construction profiles can be. In this project, 20 × 20 mm profiles were connected to form a shelving frame and equipped with HPL panels as shelves and transparent acrylic sheets as plant supports.
Thanks to the modular design, the height, width and number of levels can be adapted to individual requirements. Additional components such as lighting, plant trays or holders can be attached via the profile slots.
Materials used
- Aluminium construction profiles: 20 × 20 mm for the shelving frame.
- Connectors: Internal corner connectors and 3-way corner connectors for 20 mm construction profiles.
- HPL panels: As stable shelves.
- Acrylic sheets: As transparent plant supports.
Suitable HPL panels and acrylic sheets can be ordered cut to size directly to suit the planned construction.
Accessories for aluminium construction profiles at a glance
With the right accessories, aluminium construction profiles can be connected, extended and supplemented with additional functions. Which components are required depends on whether, for example, a rigid frame, a door, a mobile stand or a height-adjustable construction is to be built.
Angle connectors and internal connectors
Angle connectors are suitable for 90° connections and are often used for frames, stands and substructures. Internal connectors are installed inside the profile slot and enable a particularly unobtrusive connection.
3-way corner connectors and profile connectors
3-way corner connectors join three profiles at a common corner point and are therefore suitable for three-dimensional frame constructions. Profile connectors are used when two aluminium profiles need to be connected or extended lengthwise.
Slot nuts for aluminium profiles
Slot nuts provide a threaded point inside the profile slot. This allows connectors, hinges, handles, holders and other accessories to be positioned and fastened flexibly along the profile slot.
Hinges and handles
Hinges are used when doors, flaps or movable frames are to be integrated into the construction. Handles complement these movable elements and make opening and closing easier.
Levelling feet and castors
Levelling feet allow a construction to be aligned on uneven floors. Castors, on the other hand, make stands and frames mobile. Depending on the application, swivel castors with locking brakes can be used so that the construction can both be moved and fixed at the intended location.
End caps and slot covers
End caps close open profile ends and provide a clean finish. Slot covers conceal open profile slots, giving the construction a more closed appearance while also making it easier to clean.
A wide selection of profiles, connectors and suitable accessories can be found directly in our category for aluminium construction profiles.
Common mistakes when installing aluminium construction profiles
- Not aligning profiles squarely: Even small deviations can cause frames to become distorted or doors not to close cleanly later.
- Fully tightening screws too early: Initially tighten connections only lightly and only fully tighten them after complete alignment.
- Using too few or unsuitable connectors: The number and type of connecting elements must suit the construction and occurring load.
- Using the wrong accessories for the slot: Slot nuts, connectors, screws and other accessories must match the profile used and its slot size.
- Not deburring cut edges: Burrs and swarf can make it difficult to install connectors or end caps and should be removed before assembly.
- Not considering the load: Profile size, span, connections and design must suit the later load on the construction.
Installing aluminium construction profiles: the key points summarised
Aluminium construction profiles can be flexibly connected with the right accessories to create frames, stands, doors, enclosures and mobile constructions. Clean planning, profiles cut squarely and connecting elements that suit the respective profile and planned load are decisive.
Internal corner connectors and angle brackets are suitable for classic frame constructions, profile connectors enable longer structures and 3-way corner connectors simplify the construction of three-dimensional structures. Hinges, handles, levelling feet and castors add further functions to the profile system.
By initially tightening connections only lightly, carefully aligning the entire construction and then tightening the screws evenly, you create a good basis for a straight and clean structure.
Suitable aluminium construction profiles, connectors and accessories can be selected directly to suit the planned project.
Frequently asked questions about installing aluminium construction profiles
How are aluminium construction profiles connected to one another?
Depending on the construction, aluminium construction profiles can be connected with internal corner connectors, angle connectors, profile connectors or 3-way corner connectors. They are fastened via the profile slots using the respective suitable screws or grub screws.
Can aluminium construction profiles be extended?
Yes. Two aluminium construction profiles can be connected flush and in line using suitable profile connectors. The connectors are inserted into the profile slots and secured with grub screws.
Which tools are required for aluminium construction profiles?
Hex keys, a cordless screwdriver, tape measure, square, rubber mallet and a file or deburring tool are required for many installations. A suitable tap may additionally be required for levelling feet and castors that are screwed directly into the core bore.
Which connectors are suitable for aluminium construction profiles?
Which connectors are suitable depends on the design. Corner or angle connectors can be used for 90° connections, 3-way corner connectors for three-dimensional corner points and suitable profile connectors for profile extensions.
Which panels are suitable as infills for aluminium profiles?
Depending on the application, aluminium composite panels, HPL panels, acrylic sheets or polycarbonate sheets can be used. The selection depends, among other things, on the requirements for weight, stability, transparency, impact resistance and weather resistance.
Can a construction made from aluminium profiles be expanded later?
Yes. Thanks to the modular slotted-profile system, additional profiles, holders, doors, cladding, castors and other components can also be added or modified later.
Do aluminium profiles need to be deburred after cutting?
After cutting profiles yourself, the cut edges should be cleared of burrs and swarf. This allows connectors, end caps and other accessories to be installed cleanly and avoids sharp cut edges.
Category Usage tips
- Aluminium composite panel installation guide: fastening, applications & tips for indoors and outdoors
- Aluminium construction profiles: applications, planning and accessories
- Assembly adhesive applications and processing - tips for strong bonds
- Assembly adhesive vs. drilling – which fastening method is the better choice?
- Avoid root damage by using root barriers