
Wall cladding in stainless steel look – modern solutions with aluminium composite panels
Posted on May 2, 2026
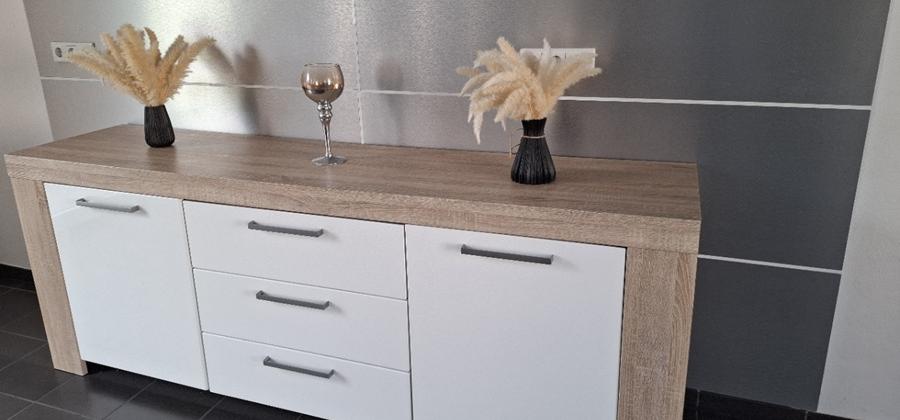
Modern wall cladding in a stainless steel look creates an elegant, timeless appearance – aluminium composite panels make it quick and easy to achieve this premium look without major effort.
Wall cladding in a stainless steel look creates modern accents in kitchens, dining areas or living rooms. Brushed aluminium composite panels combine a metallic appearance with a smooth, easy-care surface and can be effectively complemented by white high-gloss surfaces.
In this blog, we use a practical project to show how aluminium composite panels in a brushed stainless steel look and white DecoVitas high-gloss panels can be used as wall cladding. You will learn which materials were used, how the installation is prepared and what to consider regarding the substrate, adhesive and panel layout.
Why use aluminium composite panels for wall cladding?
Wall cladding can visually enhance existing surfaces while creating an easy-care visible surface. Brushed aluminium composite panels are particularly suitable for modern designs with a metallic stainless steel look.
- Modern surface: The brushed structure creates a premium metallic appearance.
- Easy to maintain: Smooth surfaces are easy to clean in everyday use.
- Large-area design: Wall areas can be clad with only a few visible interruptions.
- Concealed fastening possible: In suitable applications, the panels can be fastened with assembly adhesive.
- Versatile combinations: The stainless steel look can, for example, be combined with white high-gloss surfaces.
Design: The combination of structured stainless steel look and calm high-gloss surfaces is particularly effective. This allows individual wall areas to be highlighted deliberately.
Combine stainless steel look and high gloss
In the project shown, brushed aluminium composite panels were combined with white DecoVitas high-gloss panels. The two surfaces perform different design functions.
| Material | Visual effect | Typical use in the project |
|---|---|---|
| Brushed aluminium composite panel | Metallic, structured stainless steel look | Accent surfaces, TV wall, kitchen splashback and dining area |
| White DecoVitas high-gloss panel | Bright, smooth and reflective surface | Contrasting surface and calm counterpoint to the metallic look |
| Assembly adhesive | No visible screw heads | Concealed fastening on suitable substrates |
Suitable aluminium composite panels and DecoVitas decorative panels are available directly from S-Polytec.
Practical example: modern wall cladding in stainless steel look
The following examples show how brushed aluminium composite panels can be used in different living areas. Depending on the surface area, the result is either a subtle accent wall or large-area wall cladding.
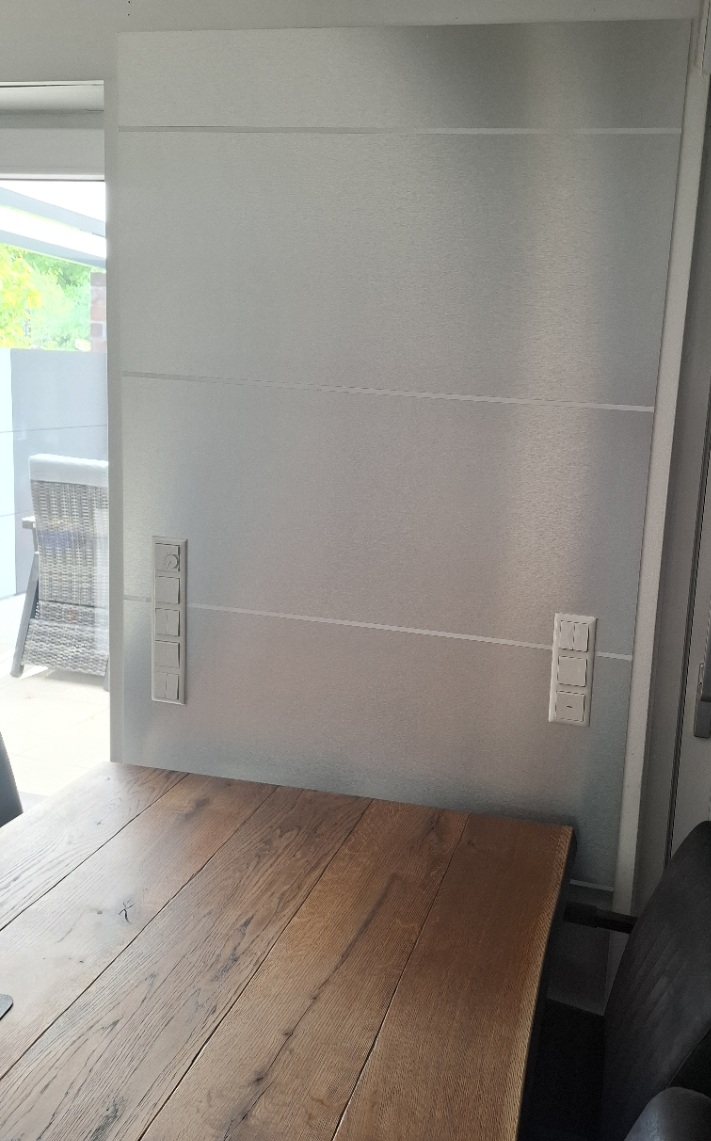
Wall cladding in the dining area
The brushed stainless steel look creates a deliberate metallic accent in the dining area and combines well with light furniture and understated wall colours.
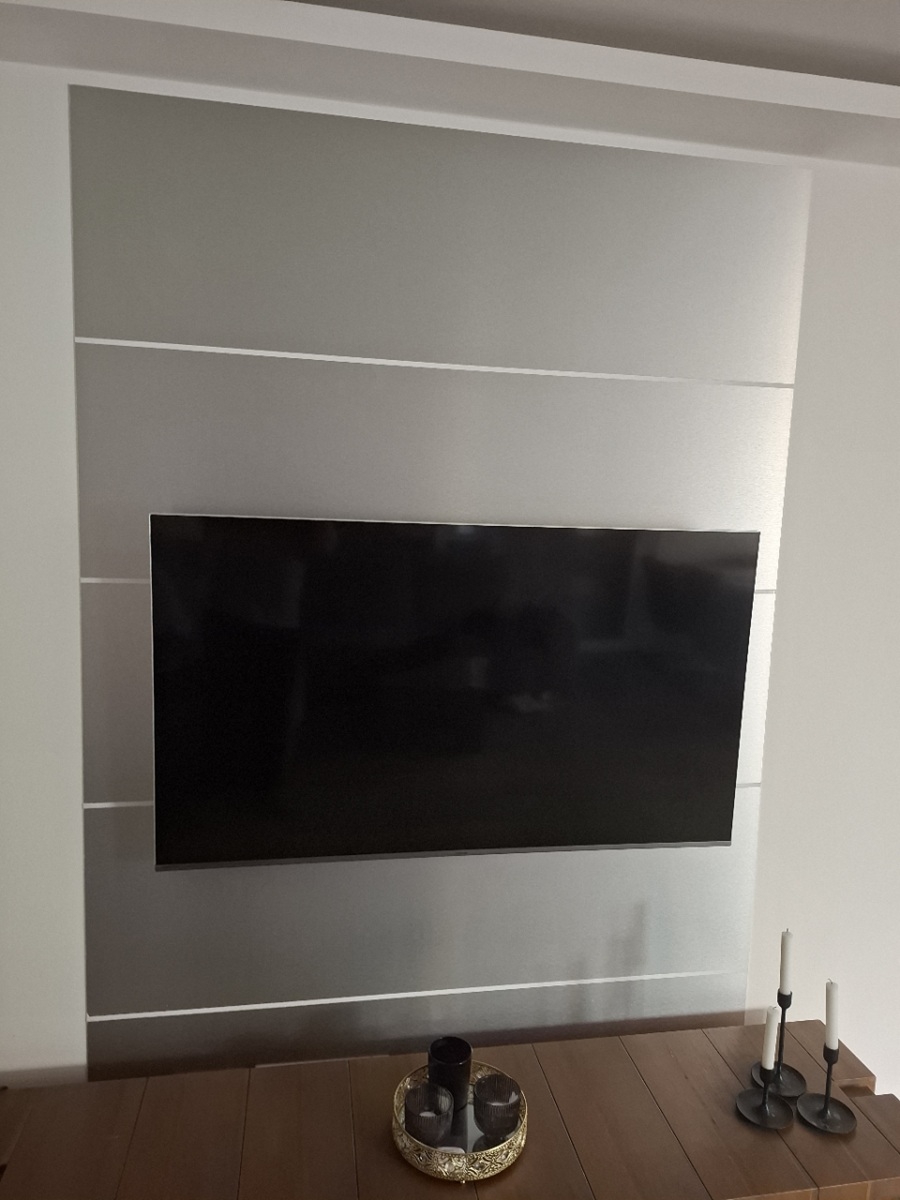
TV wall in stainless steel look
Wall cladding around the television visually separates the TV area from the rest of the living room and creates a clean, modern design.
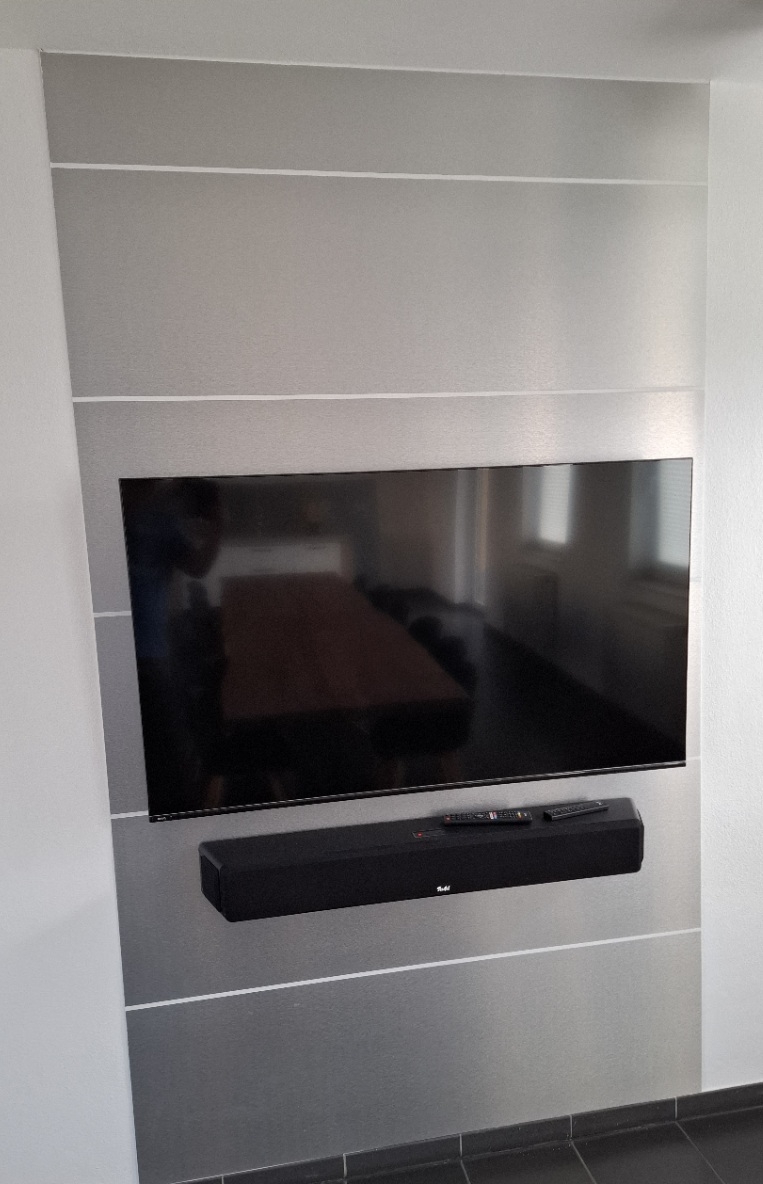
Accent surface behind the television
Directly behind the television, the brushed surface creates a calm background while also adding a premium design accent.
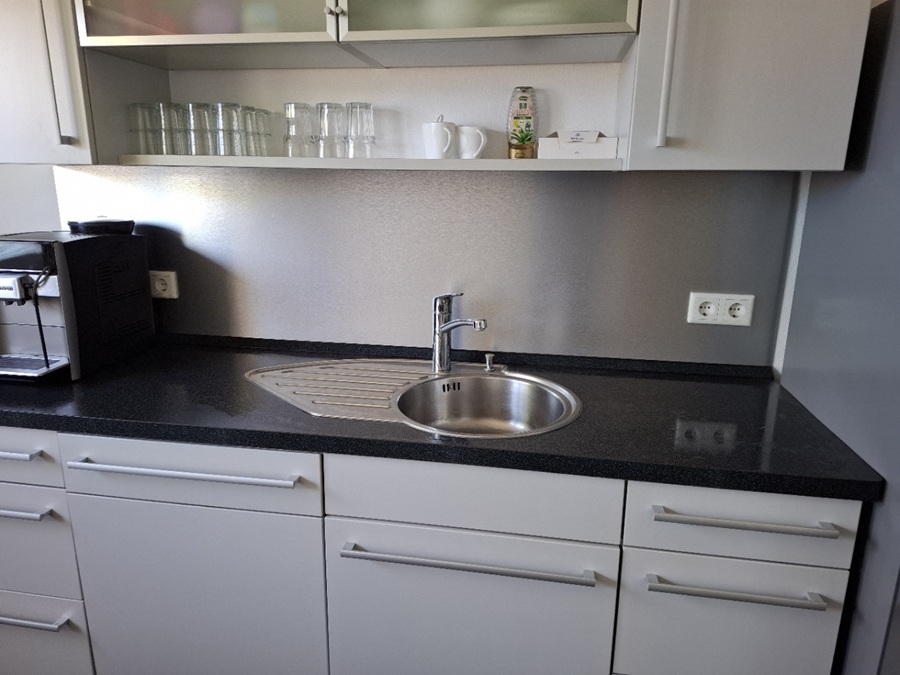
Kitchen splashback in stainless steel look
As a kitchen splashback, the brushed surface combines a modern metallic appearance with large-area, easy-care wall design.
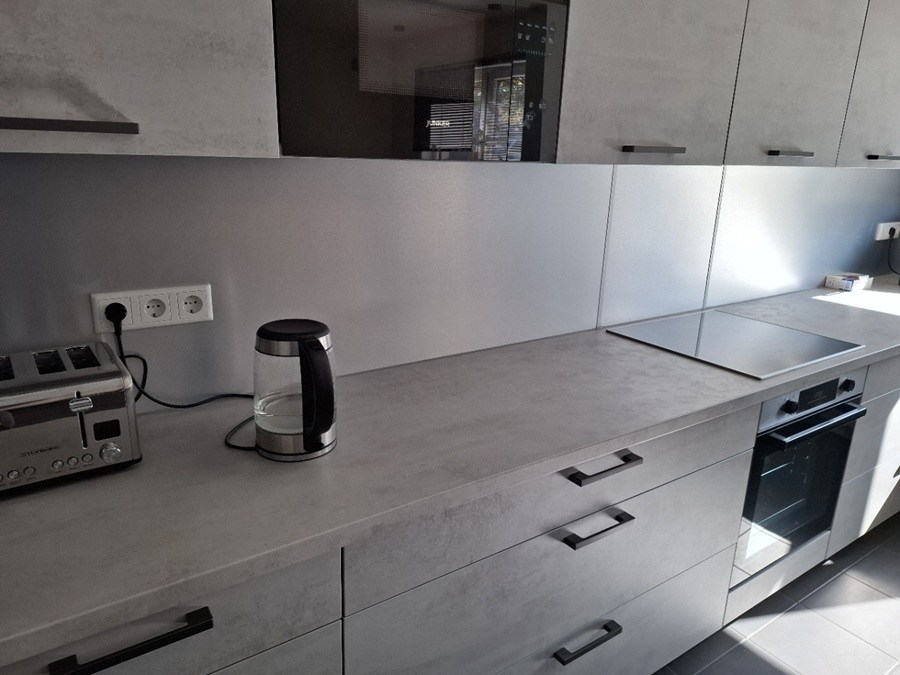
Kitchen splashback made from aluminium composite panel
Larger aluminium composite panels enable a clean kitchen splashback with few visible interruptions while reducing the number of joints that are difficult to clean.
Design idea: The stainless steel look does not have to be used on every wall. Individual accent areas often have a stronger effect and can be deliberately combined with white high-gloss surfaces.
Where is wall cladding in a stainless steel look suitable?
| Area | Design advantage | What to consider |
|---|---|---|
| Living room | Accent surface behind TV or furniture | Plan panel layout and joint pattern in advance. |
| Dining area | Easy-care design surface | The substrate must suit the selected fastening method. |
| Kitchen | Large-area kitchen splashback or rear wall | Allow for distances from heat sources and appliance specifications. |
| Hallway and entrance area | Robust decorative wall surface | Consider impact loads and edge finishing. |
| Shopfitting and interior construction | Modern metallic look without solid stainless steel sheet | Select the substructure or adhesive system to suit the application. |
Kitchen area: Whether wall cladding is suitable directly behind hobs or other strong heat sources depends on the panel design, distance and appliance specifications. The panel should therefore not be regarded generally as a heat-resistant protective panel for every installation situation.
Required materials
- Brushed aluminium composite panels: for wall surfaces in stainless steel look.
- DecoVitas high-gloss panels: as bright contrasting surfaces.
- Assembly adhesive: for concealed fastening on suitable substrates.
Install wall cladding step by step
For adhesive installation, clean preparation is particularly important. The individual work steps build on each other and should therefore be carried out in the correct order.
- 1. Check the wall surface: The substrate must be sound, sufficiently even and suitable for the selected adhesive system.
- 2. Clean the surface: Remove dust, grease, loose coatings and other residues that reduce adhesion.
- 3. Check dimensions: Check panel size, cut-outs, sockets, edges and planned joint pattern before installation.
- 4. Prepare the panels: Check cut-to-size panels and clearly determine the required visible side.
- 5. Apply assembly adhesive: Apply according to the instructions for the adhesive used.
- 6. Position the panels: Place the panel, align it precisely and press it on evenly.
- 7. Fix in place: If necessary, secure the panel against slipping during curing.
- 8. Allow to cure: Observe the curing time specified by the adhesive manufacturer.
- 9. Remove protective film: Carefully remove the protective film once installation is complete.
Bonding in detail: We explain substrate preparation, adhesive application and curing in detail in the blog Bonding aluminium composite panels.
Important tips for clean wall cladding
- Level the substrate: Unevenness can affect panel alignment and the later joint pattern.
- Leave protective film on as long as possible: This better protects the visible surface from scratches during installation.
- Plan the joint pattern in advance: Especially with several panels, transitions should be defined before bonding.
- Observe decorative direction: With brushed surfaces, all panels should be installed in the intended structural direction.
- Select the right adhesive: Material, substrate and application must suit the assembly adhesive used.
- Use contrasts deliberately: The stainless steel look works particularly well when it does not dominate every wall surface completely.
Plan material requirements for the wall cladding
The actual material requirement depends on wall area, panel layout, cut-outs and adhesive application. Fixed cost figures are therefore of limited value and may also change with product prices.
| Item | Planning basis |
|---|---|
| Aluminium composite panels | Wall area plus required cut-outs and a sensible allowance |
| DecoVitas high-gloss panels | Depends on the desired proportion within the design concept |
| Assembly adhesive | Calculate consumption according to adhesive, bead cross-section and intended bonding pattern |
| Cut-to-size planning | Define cut-outs, panel layout, joints and edge areas before ordering |
Tip: For several wall areas, it is worth preparing a simple dimension sketch before ordering. This makes it easier to plan the panel layout and cut-to-size requirements efficiently.
Wall cladding in stainless steel look: the key points summarised
Brushed aluminium composite panels make it possible to create modern wall surfaces in a stainless steel look without using solid stainless steel sheets. Especially in kitchens, dining areas and living rooms, this creates clean and easy-care accent surfaces.
Combining them with white DecoVitas high-gloss panels creates a deliberate material contrast between metallic structure and calm high-gloss surface. A well-planned joint pattern, a suitable substrate and fastening appropriate for the project are particularly important for a clean result.
Suitable brushed aluminium composite panels in stainless steel look are available directly from S-Polytec.
Frequently asked questions about wall cladding with aluminium composite panels
Can aluminium composite panels be used as wall cladding?
Yes. Aluminium composite panels can be used, for example, as decorative wall cladding, TV walls, kitchen splashbacks or accent surfaces, provided the selected panel type is suitable for the intended application.
Can aluminium composite panels be bonded directly to a wall?
Direct adhesive installation is possible on suitable, sound and sufficiently even substrates. The assembly adhesive and substrate must, however, be compatible with the respective application.
Can aluminium composite panels be bonded to tiles?
This may be possible if the tiles are firmly attached, the surface is properly prepared and the assembly adhesive used is suitable for the non-absorbent substrate.
Are aluminium composite panels suitable as a kitchen splashback?
Suitable aluminium composite panels can be used as kitchen splashbacks or rear walls. In areas directly adjacent to strong heat sources, however, material approvals, required distances and appliance specifications must be observed.
How do you clean wall cladding made from aluminium composite panels?
Cleaning depends on the respective surface coating. As a rule, soft cloths and suitable mild cleaning agents should be used. Strong abrasive cleaners and abrasive sponges should be avoided.
Does the wall have to be completely even before bonding?
The substrate should be sufficiently even so that the panel can be installed without stress and a clean joint pattern can be achieved. Larger uneven areas should be levelled before installation.
Why should the protective film only be removed after installation?
The protective film protects the visible surface against scratches and dirt during transport, processing and installation. It should, however, be removed after the work is complete in accordance with the product instructions.