
Bonding acrylic glass – adhesives, preparation and instructions
Posted on Jul 28, 2026
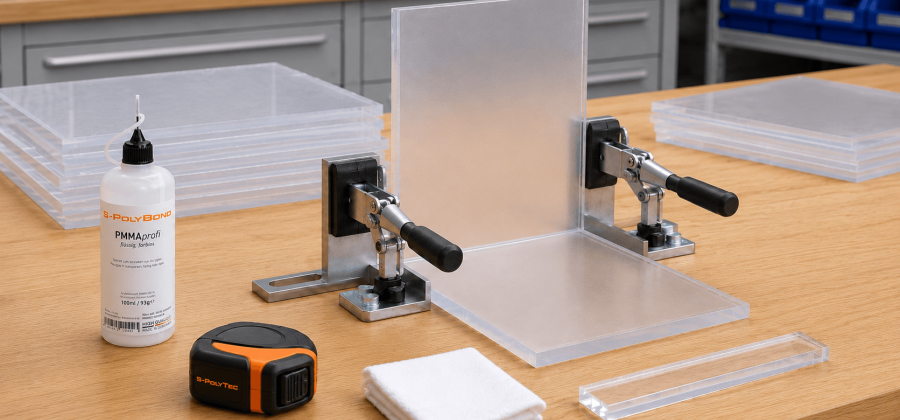
This blog explains which adhesive is suitable for acrylic glass, how the different adhesive types compare, and how to bond acrylic glass cleanly, permanently and without internal stress.
Bonding acrylic glass is reliable when the adhesive matches the material combination and the purpose of the joint. An almost invisible acrylic-to-acrylic joint has different requirements from an elastic seal or a structural bond to metal. Accurately fitting bonding surfaces, stress-free alignment and undisturbed curing are equally important.
In this blog, we explain how to bond acrylic glass correctly, which types of adhesive can be used, and how solvent-welding adhesives, two-component adhesives, silicones, assembly adhesives and adhesive tapes differ. You will also learn what to consider with XT and GS acrylic glass, transparent surfaces, repairs and combinations of different materials.
Which adhesive is suitable for acrylic glass?
The right adhesive depends on the materials being joined, how accurately the bonding surfaces fit together and the properties required of the finished joint. A clear acrylic-to-acrylic joint requires a different adhesive from an elastic seam or a joint between acrylic glass and metal. The starting point is always suitable, accurately cut acrylic sheets cut to size.
| Bonding task | Suitable adhesive type | Note |
|---|---|---|
| Close-fitting acrylic glass to acrylic glass | PMMA solvent-welding or capillary adhesive | Low viscosity; close-fitting joints can produce a material bond with a visually discreet appearance |
| Acrylic glass with small gaps or structural loads | Suitable two-component acrylic adhesive | Gap-filling and suitable for structural joints |
| Acrylic glass to metal | Two-component adhesive approved for the material combination | High strength with dissimilar materials; observe material approval and primer requirements where applicable |
| Elastic joint or seal | Acrylic-compatible silicone or MS polymer | Flexible and able to accommodate movement, but does not form a material PMMA bond |
| Temporary or removable joint | Suitable adhesive tape or mechanical fixing | Quick to install and, depending on the system, removable |
Important: Not every plastic adhesive is automatically suitable for acrylic glass. Always check the material approval, required joint width, subsequent loads and current product and safety information.
Capillary adhesive for close-fitting acrylic joints
Low-viscosity PMMA adhesives are particularly suitable for acrylic edges that fit together exactly. Their capillary action allows them to flow into a very fine joint gap. The surface of the acrylic glass is softened in the joint area and forms a material bond after the adhesive has evaporated or reacted.
A suitable solution is S-Polybond PMMAprofi. This colourless, very low-viscosity specialist adhesive was developed for solvent welding acrylic glass or PMMA. It is suitable for transparent, coloured and opal acrylic glass and for repairing close-fitting cracks and fractures. Its high capillary action also allows it to penetrate very fine gaps.
According to the product information, a properly executed adhesive joint is watertight after it has cured completely. The adhesive can also be used outdoors. The joint must remain protected from moisture while curing. PMMAprofi is only conditionally suitable for coated acrylic glass because a coating can impair the bonding effect.
- Suitable: Acrylic glass or PMMA and, according to the product information, ABS, ASA, SAN, PVC and PS, among other materials.
- Not suitable: PE, PP, PTFE, PET, POM and EPDM.
- Visible surfaces: The adhesive is colourless and can therefore also be used with transparent, coloured and opal acrylic glass.
- Outdoor use: Possible, provided the joint is protected from moisture until fully cured.
Two-component adhesive for structural joints
If the joint is not almost gap-free, as required for a capillary adhesive, or if dissimilar materials need to be joined structurally, a suitable two-component adhesive may be the better choice. These systems consist of an adhesive and an activator or hardener, which are mixed in the specified ratio during application.
Suitability must always be checked for the specific combination of materials. A two-component adhesive should only be used if the system covers both materials, the joint width and the subsequent load. For acrylic plastics combined with metals or other approved materials, Plexus MA300, for example, may be suitable.
Plexus MA300 is a non-sagging two-component methacrylate system with a mixing ratio of 1:1. At 23 °C, the technical data sheet specifies a working time of 3 to 6 minutes, a fixture time of 12 to 15 minutes and a gap-filling capacity of 0.3 to 3.2 mm. It is recommended for acrylic plastics, ABS, PVC, aluminium, carbon steel and stainless steel, among other materials. The technical data sheet recommends a primer for the metals listed. The specific joint should be tested under its subsequent operating conditions.
How does solvent welding work with acrylic glass?
During solvent welding, the acrylic parts are not joined by a conventional adhesive film that permanently remains between them. Instead, the adhesive softens the PMMA surface in the joint area in a controlled manner. This joins the two surfaces, creating a material-bonded seam after complete curing.
This method works particularly well when the edges are flat, clean and fit together accurately. A very low-viscosity capillary adhesive cannot reliably bridge large gaps. Visible saw marks, chipping or uneven edges can also cause an irregular joint or trapped air.
Rule of thumb: The better the parts fit together before bonding, the more even a capillary acrylic joint can be.
Preparing acrylic glass correctly for bonding
A high-quality adhesive seam begins before the adhesive is applied. Both parts must be dimensionally accurate, dry and clean, and they must fit together without internal stress. If poorly fitting parts are forced into position with clamps, internal stress remains after curing. This can put strain on the joint or encourage stress cracks in the acrylic glass.
Inspect the bonding edges
- Accurate fit: The surfaces must meet evenly without excessive pressure.
- Flatness: Bent or uneven edges create varying joint widths.
- Clean edges: Dust, chips and machining residue must be removed.
- No deep notches: Damage can concentrate stress and remain visible.
- Trial assembly: The parts should be aligned completely before bonding.
Sawn edges can be suitable for many adhesive joints if they are clean, straight and accurately matched. Heavily scored or chipped edges should be professionally finished before bonding. A high-gloss polished edge is not automatically the best bonding surface: polishing residue or a surface altered by machining can affect wetting. The preparation instructions for the adhesive used are therefore decisive.
Remove the protective film only in the bonding area
Keep the protective film on the remaining visible surfaces wherever possible. Remove or cut it back only far enough to ensure it neither extends into the joint nor allows adhesive to run beneath it. Do not score the acrylic surface when cutting back the film.
Clean the bonding surfaces appropriately
The parts to be joined must be dry and free from dust, grease and loose particles. First remove coarse chips and dust carefully without rubbing them across the visible surface. Do not use abrasive products, aggressive household cleaners or untested solvents. Only cleaning products and methods approved by the adhesive manufacturer may be used to prepare the actual bonding surfaces.
An acrylic glass cleaner is not automatically suitable as a pre-cleaner for an adhesive joint. Conditioning or oily ingredients can affect adhesion. Do not touch cleaned bonding surfaces with your fingers afterwards. For important visible parts, we recommend a trial bond using an offcut of the same acrylic type and material thickness.
How to bond acrylic glass step by step
- 1. Select the bonding method: Choose the adhesive based on the material combination, joint width, load and desired appearance.
- 2. Check safety requirements: Read the product label and safety data sheet and prepare ventilation and protective equipment.
- 3. Trial-fit the parts: Check dimensions, angles, support and fit without adhesive.
- 4. Cut back the protective film: Remove the film only in the immediate bonding area.
- 5. Clean the bonding surfaces: Remove dust, grease and machining residue using an approved method.
- 6. Align the parts: Position the acrylic parts precisely without forcing them against each other.
- 7. Secure them safely: Use stops, angle supports or suitable clamping aids with soft protective layers.
- 8. Dose the adhesive: Apply it to the joint in a controlled manner and according to the manufacturer's instructions.
- 9. Keep the parts still: Do not make corrections once the parts have been joined.
- 10. Observe the fixture time: Leave the joint undisturbed in its intended position.
- 11. Allow it to cure completely: Do not load, clean or wet the joint until the specified curing time has elapsed.
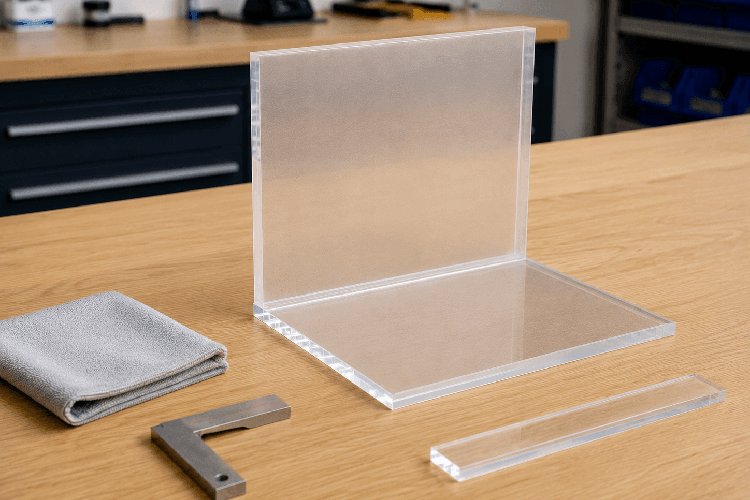
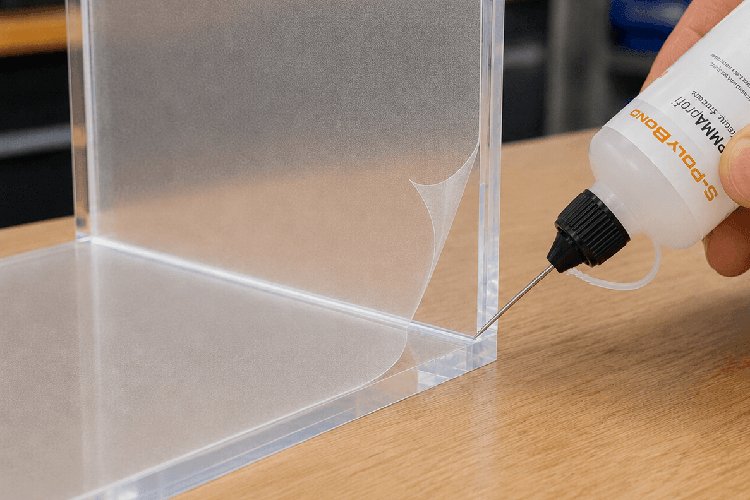
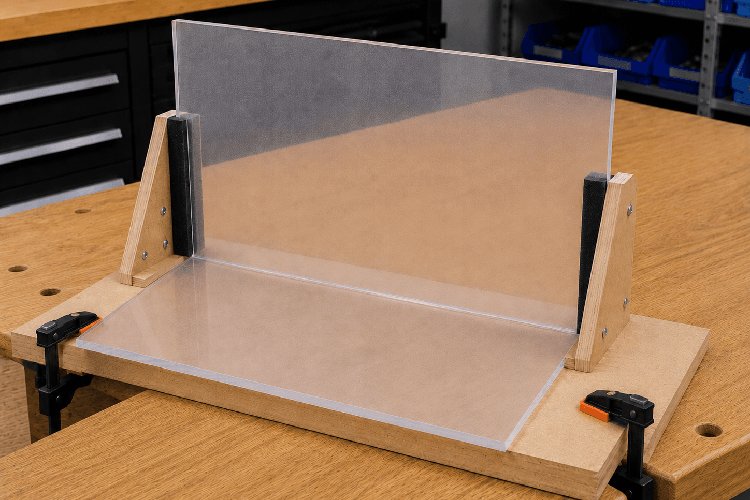
Align the acrylic sheets accurately, apply the adhesive to the joint in a controlled manner and secure the joint without internal stress while it cures.
Practical tip: Do not wipe excess solvent-welding adhesive across the visible surface. It can soften the material, make it matt or leave streak-like damage. Apply the adhesive sparingly and protect adjacent areas.
Why an accurate fit is crucial in practice
With an evenly fitting joint, low-viscosity PMMA adhesive can flow into the gap in a controlled manner by capillary action. Varying joint widths, small chips or stressed parts, on the other hand, encourage visible air pockets and uneven seams. A careful trial assembly is therefore more important than trying to correct the joint afterwards with additional adhesive.
Bonding XT and GS acrylic glass
XT acrylic glass is extruded, while GS acrylic glass is cast. Both variants are made from PMMA and can be joined with suitable acrylic adhesives. However, they differ in their internal stress and their behaviour during machining and contact with solvents.
Bonding XT acrylic glass
Extruded acrylic glass may contain higher internal stress as a result of manufacture or machining. Incorrect machining, excessive force or unsuitable solvents can therefore promote stress cracking. Accurately fitting parts, careful machining and stress-free securing are particularly important.
Bonding GS acrylic glass
Cast acrylic glass is considered to have lower internal stress and is particularly suitable for high-quality machining and precise bonding. However, this does not mean that every GS joint is automatically free of defects. The edges, adhesive dosage and curing process must still suit the construction.
You can find more differences between the variants and suitable sheets in our acrylic sheets cut to size category. Our blog Acrylic glass and PLEXIGLAS® in detail explains the fundamentals of PMMA and the well-known PLEXIGLAS® brand name.
Bonding transparent, coloured and opal acrylic glass
The basic bonding technique is similar for transparent, coloured and opal acrylic glass. The main differences concern how visible the adhesive seam and any defects will be.
- Transparent acrylic glass: Air bubbles, matt areas and uneven adhesive distribution are particularly easy to see.
- Coloured acrylic glass: Colourless adhesives preserve the colour effect, but residue may remain visible.
- Opal acrylic glass: The adhesive seam is less noticeable but must still be even and free from internal stress.
- Fluorescent acrylic glass: Uneven joints may be highlighted by the luminous effect at the edges.
- Coated acrylic glass: Check the coating requirements and adhesive compatibility before bonding.
For high-quality visible surfaces, test the adhesive joint on an offcut and then inspect it under light shining from the side.
Joining acrylic glass to other materials
If acrylic glass is joined to metal, wood or another plastic rather than to acrylic glass, the generic term “plastic adhesive” is not sufficient. The adhesive must cover both materials. Differences in thermal expansion, surface structure and loading must also be considered.
Bonding acrylic glass to metal
For strong joints between acrylic plastics and metals, a two-component acrylic adhesive approved for both materials can be used. The Plexus MA300 technical data sheet lists aluminium, carbon steel and stainless steel as recommended substrates and advises using a primer for these metals. Plan the joint so that differences in temperature-related movement do not generate impermissible stress. For large components, a more flexible joint or mechanical fixing may be more suitable.
Bonding acrylic glass to wood
Wood is absorbent and changes with humidity and temperature. Depending on the construction, suitable assembly adhesives, MS polymers or adhesive tapes can be used for this material combination. An almost invisible capillary PMMA seam is not possible with this type of joint.
Bonding acrylic glass to other plastics
Depending on the adhesive, ABS, ASA, SAN, PVC and PS can be joined to acrylic glass. Polyolefins such as PE and PP, however, require special adhesive systems and must not be treated as though they were covered by a general plastic approval. Always check both materials, not just the acrylic glass. Our blog Which adhesive for plastic? provides an overview across different materials.
Planning note: In addition to adhesion, differences in thermal expansion must be considered when combining materials. A very rigid bond can restrict movement and introduce stress into the acrylic sheet.
Silicone, assembly adhesive and adhesive tape for acrylic glass
Joining or sealing acrylic glass with silicone
Silicone creates an elastic seam and is mainly suitable for sealing or movement-compensating joints. It does not form a material PMMA bond like a solvent-welding adhesive. Use only a product expressly compatible with acrylic glass. Unsuitable systems may fail to adhere or damage the material.
Assembly adhesives and MS polymer adhesives
Suitable assembly adhesives, for example those based on MS polymers, can be useful for bonding acrylic glass to absorbent or mineral substrates and for flexible installation tasks. They remain as a visible adhesive layer between the parts and are therefore not the first choice for a crystal-clear edge.
Fixing acrylic glass with adhesive tape
Double-sided adhesive tapes enable quick, even and in some cases removable installation. The decisive factors are adhesion to both materials, temperature range, moisture, UV exposure, joint movement and the visible edge of the tape. Suitability must be checked separately for safety-critical or permanently highly loaded structures.
If acrylic glass is to be fixed mechanically instead of bonded, the hole, movement allowance and pressure distribution must be planned appropriately. Our blog Drilling acrylic glass correctly explains the full procedure.
Bonding cracks and fractures in acrylic glass
Small cracks or close-fitting fractures can be repaired with a suitable low-viscosity PMMA adhesive. Capillary action allows the adhesive to penetrate fine cracks. Whether the repair is a sensible permanent solution, however, depends on the cause, position and loading of the damage.
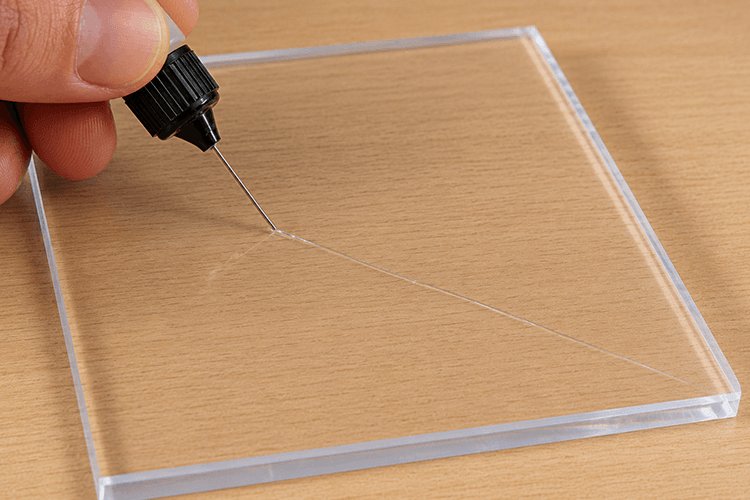
- Check the cause: A stress crack may recur if the original load remains.
- Do not force fractured pieces: The parts must fit into their original position without excessive stress.
- Keep the crack clean: Dirt in the fracture remains visible after bonding and can impair the joint.
- Consider the load: Safety-critical, load-bearing or heavily water-loaded parts should not be repaired without careful assessment.
- Assess the appearance realistically: Even a strong repair may remain visible as a line or through light refraction.
Replacement is often the better solution for deep stress cracks, extensive fractures, broken fixing points or safety-critical components.
Curing, fixture time and load-bearing capacity
Working time, fixture time and complete curing are not the same. During the working time, the parts can be assembled according to the manufacturer's instructions. After the fixture time, the joint holds its position but is not necessarily fully load-bearing. The final properties are only achieved after complete curing.
According to the product information for S-Polybond PMMAprofi, the working time is approximately 2 to 3 minutes, the fixture time approximately 30 minutes and complete curing approximately 24 hours. With highly stressed or bent components, the fixing should remain in place until the adhesive has cured completely. During this period, the joint must remain still, free from internal stress and protected from moisture.
Different times and processing conditions apply to two-component adhesives. At 23 °C, the Plexus MA300 technical data sheet specifies a working time of 3 to 6 minutes and a fixture time of 12 to 15 minutes. Temperature, adhesive quantity, joint width and material can influence curing. The current information for the product used is therefore always decisive.
Important: A firm surface or apparently stable seam does not automatically mean that the adhesive has cured completely and can already withstand loads.
Handling and storing acrylic glass adhesive safely
Solvent-welding and methacrylate adhesives must be handled in accordance with their labels and safety data sheets. S-Polybond PMMAprofi is highly flammable, causes serious eye irritation and may cause drowsiness or dizziness. Work only with good ventilation or suitable extraction and keep the product away from heat, sparks, open flames and other ignition sources.
- Eye protection: Wear tightly fitting safety goggles.
- Hand protection: Wear suitable chemical-resistant gloves; the safety data sheet specifies butyl rubber for prolonged contact.
- Ventilation: Do not inhale vapours and ensure sufficient air exchange or suitable extraction.
- Ignition sources: Do not smoke and keep adhesive away from flames, sparks and hot surfaces.
- Storage: Keep the container tightly closed in a cool, dry and well-ventilated place.
- Disposal: Do not dispose of product residue with household waste or release it into drains or waterways; comply with local regulations.
Plexus MA300 also consists of flammable components. The adhesive and activator can irritate the skin and respiratory tract and may cause allergic skin reactions. Both components must be handled only with suitable personal protective equipment and good ventilation. Also observe the current processing and safety instructions for the product.
Safety note: Always read the current safety data sheet, product label and application instructions for the adhesive before use. This blog does not replace a workplace risk assessment.
Common mistakes when bonding acrylic glass
- Wrong adhesive: It may provide insufficient adhesion, attack the surface or fail to meet the required load.
- Gap too large for capillary adhesive: A low-viscosity adhesive cannot reliably fill a structural gap.
- Contaminated bonding edges: Dust, grease and chips remain visible and weaken the joint.
- Stressed parts: Clamps must not be used to force poorly fitting parts into shape.
- Too much adhesive: Excess adhesive can run across the visible surface and leave matt marks.
- Moving parts afterwards: Movement during initial curing can create bubbles and uneven joints.
- Loading too early: The joint may move or be permanently weakened.
- Unsuitable cleaning: Aggressive or unapproved products can cause stress cracks or adhesion problems.
- Ignoring thermal expansion: Different material movements can place long-term stress on rigid joints.
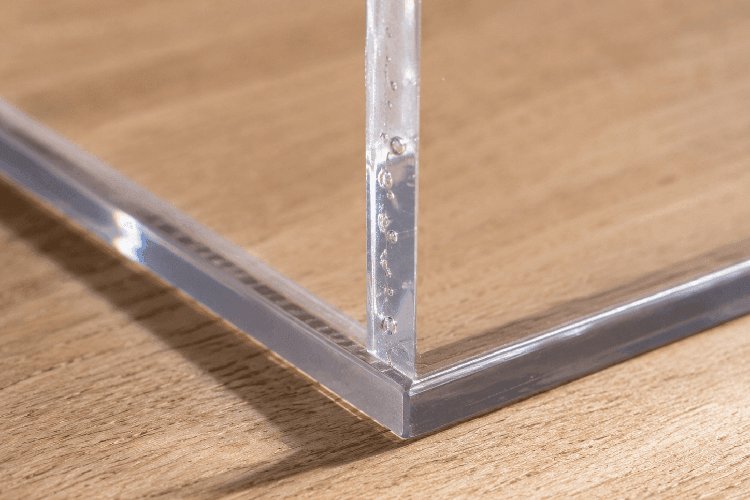
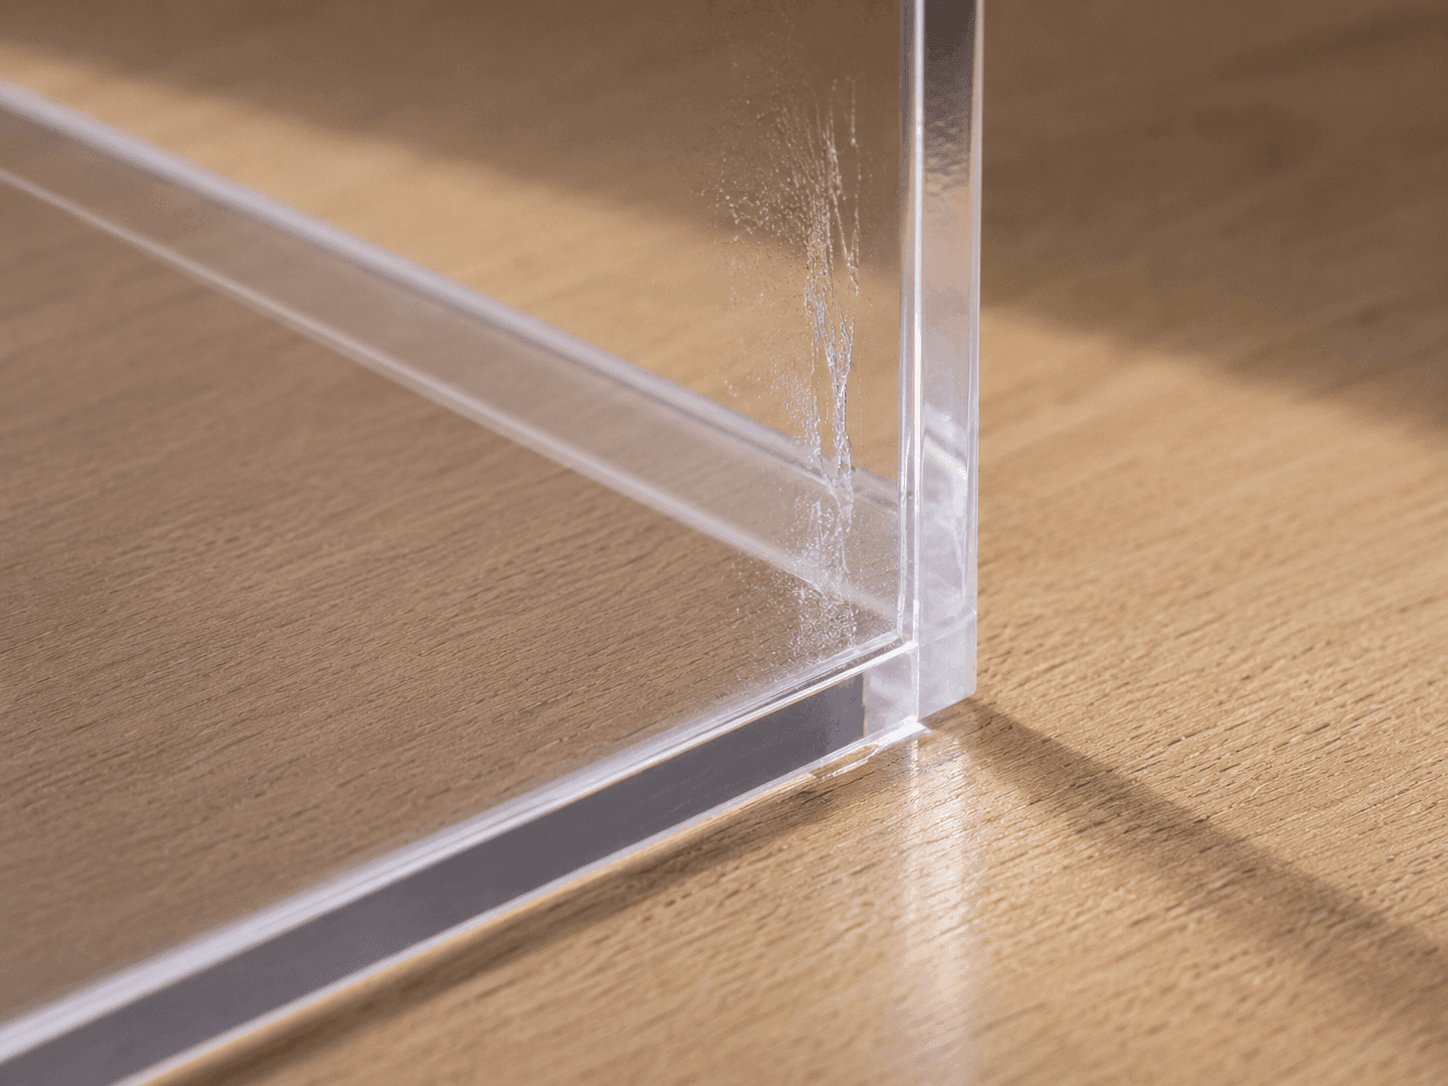
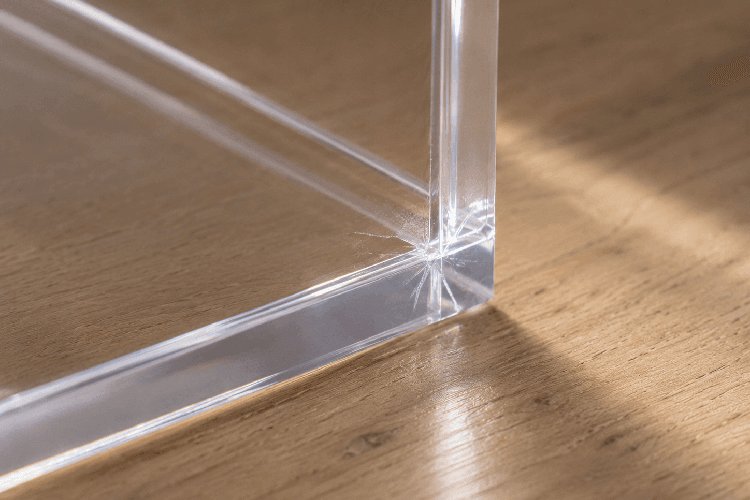
Typical defects include air bubbles, adhesive marks on visible surfaces and stress cracks caused by parts bonded under tension.
Bonding acrylic glass correctly: key points at a glance
For a clean acrylic glass joint, the adhesive, material combination and joint design must be compatible. Close-fitting acrylic-to-acrylic joints can be made almost invisible with a low-viscosity PMMA solvent-welding adhesive. Suitable two-component adhesives may be required for larger gaps, structural joints or combinations of different materials. Silicones and MS polymers, on the other hand, are primarily used for elastic joints and seals.
Align the parts completely before bonding, keep the bonding surfaces clean and secure the construction without internal stress. Dose the adhesive in a controlled manner and do not move the parts during the fixture and curing periods.
Suitable acrylic sheets cut to size and S-Polybond PMMAprofi acrylic glass adhesive are available directly from our online shop. Our blog Build your own acrylic glass aquarium presents a specific project involving cutting, bonding and leak testing.
Frequently asked questions about bonding acrylic glass
Which adhesive is suitable for acrylic glass?
Special PMMA solvent-welding or capillary adhesives are suitable for close-fitting acrylic-to-acrylic joints. A suitable two-component adhesive may be required for larger gaps, structural joints or combinations with other materials.
Can acrylic glass be bonded almost invisibly?
A visually discreet joint is possible with a colourless PMMA capillary adhesive if the bonding edges are clean, flat and fit together accurately. Air bubbles, machining marks or excess adhesive can nevertheless make the seam visible.
Can acrylic glass be bonded with superglue?
Depending on the product, superglue may adhere to certain plastics, but it is often not the best choice for high-quality transparent acrylic joints. It can produce visible adhesive edges, blooming or a brittle seam. Prefer a system expressly approved for acrylic glass.
Can acrylic glass be bonded with silicone?
Acrylic-compatible silicone can be used for elastic joints and seals. However, it does not create a material PMMA bond and is not automatically suitable for load-bearing structures.
How long does acrylic glass adhesive need to cure?
The curing time depends on the adhesive used. According to the product information for S-Polybond PMMAprofi, the working time is approximately 2 to 3 minutes, the fixture time approximately 30 minutes and complete curing approximately 24 hours. The current information for the product used is always decisive.
Can acrylic glass be bonded watertight?
According to the product information for S-Polybond PMMAprofi, a properly executed joint is watertight after complete curing. The watertightness of an entire construction also depends on accurate cutting, joint design, sheet thickness, stress-free processing and complete curing.
What should be considered when bonding XT and GS acrylic glass?
Both variants can be joined with suitable PMMA adhesives. GS acrylic glass generally has lower internal stress. With XT, careful machining, accurately fitting edges and stress-free securing are particularly important to prevent stress cracks.
How do you remove adhesive residue from acrylic glass?
Do not wipe fresh solvent-welding adhesive across the visible surface because it can soften the acrylic glass. Depending on its position, cured residue may only be removable by mechanical finishing. Superficial scratches or matt areas can sometimes be polished afterwards, but deeply softened or chemically damaged surfaces cannot be restored reliably in this way. Our blog Polishing acrylic glass provides instructions for surface finishing. The best solution remains sparing application and protecting adjacent surfaces before bonding.
Category Anwendungstipps
- Avoid root damage by using root barriers
- Build your own acrylic glass aquarium: planning, cutting & bonding
- Build your own privacy screen from HPL sheets
- Buy weatherproof and waterproof panels for outdoor use
- Cladding a roof overhang with aluminium composite panels – modern, durable and easy to install