
Build your own privacy screen from HPL sheets
Posted on Aug 25, 2026
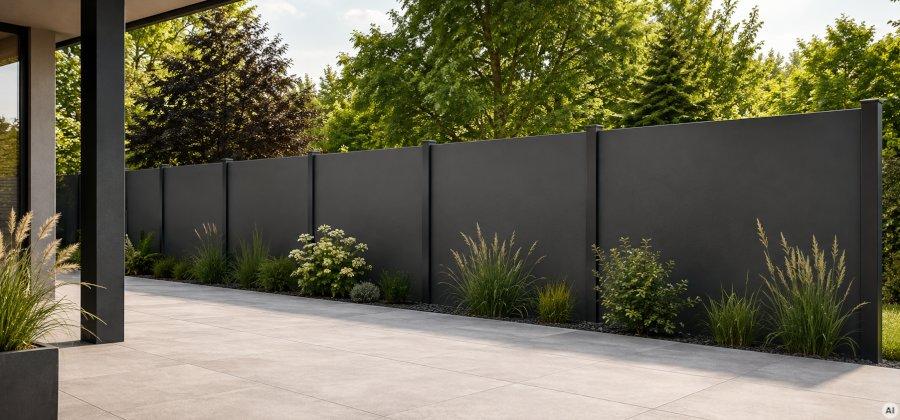
Build your own HPL privacy screen for the garden or patio: planning, sheet thickness, substructure, wind load, joints and installation explained clearly.
A privacy screen made from HPL sheets is suitable for gardens and patios where a closed, robust and low-maintenance surface is required. Whether it is a free-standing fence, a side screen for a patio or a separate garden wall, the sheet format, substructure, wind load and fastening system must be planned together before construction begins.
This guide explains step by step how to plan and build an HPL privacy screen, divide it into practical panels and account for the substructure, stability, movement clearance and ground clearance. Suitable custom-cut HPL sheets are available from us in different colours, finishes and thicknesses.
HPL privacy screens for gardens and patios
Compact HPL sheets rated for outdoor use can form closed privacy panels on a load-bearing structure. Custom cutting allows each element to be matched to the planned panel dimensions when it is ordered.
An HPL privacy fence can run alongside a patio, form a property boundary or stand as a free-standing garden wall. It can also screen a seating area, outdoor shower, bin storage area or pool. What matters is not only the HPL sheet but the complete assembly of sheet, substructure, posts and anchoring.
The resistant surface, high inherent rigidity and low maintenance requirements make HPL attractive for privacy screens. Unlike an open fence, however, it forms a largely closed surface, so the wind can exert considerably more force on the construction.
- Closed surface: provides a high level of privacy.
- Individual panel sizes: HPL sheets can be cut to suit the structure.
- Suitable for outdoors: the appropriate HPL grades are intended for permanent exposure to weather.
- Flexible design: suitable for fence panels, garden walls and side screens for patios.
- Different surfaces: colours and finishes can be coordinated with the house, patio and garden.
Available versions, colours and finishes can be found in our cut-to-size HPL sheet category. Anthracite creates a particularly modern look, while lighter colours and wood finishes offer a different design.
6 or 8 mm for an HPL privacy screen?
For many larger privacy panels, an 8 mm HPL sheet is the more sensible starting point. A thickness of 6 mm is more suitable for smaller panels or structures where the sheet receives closer support.
The free span is important: this is the unsupported area between two supporting profiles or battens. The larger the distance, the more the sheet can deflect under load.
| Sheet thickness | Use for privacy screens |
|---|---|
| 6 mm | Primarily for smaller or more closely supported panels. |
| 8 mm | Often the more appropriate choice for larger elements and structures requiring greater rigidity. |
Even an 8 mm sheet is not automatically suitable for panels of any size. As the panel and exposed wind area increase, so do the requirements placed on the substructure, fasteners and posts.
Practical note: always consider sheet thickness and substructure as a single system. A thicker sheet increases rigidity but cannot replace adequately strong, correctly arranged support.
A deflection and sheet-thickness calculation for plastic sheets can provide a rough estimate of how thickness, free span and load affect deflection. It may include HPL, but it does not replace professional structural verification where safety is relevant.
Planning an HPL privacy screen correctly
Before setting posts or ordering sheets, divide the complete screen into individual panels. First determine its total length and desired height, then define the locations of posts, supporting profiles and sheet joints.
For a longer free-standing screen, several separate panels are often more practical than one very large sheet. They are easier to align, movement joints can be positioned deliberately and individual sheets are easier to replace.
Define these points before ordering
- Total length: what distance must be screened?
- Height: what height is required and permitted locally?
- Application: patio, property boundary or separation of garden areas?
- Panel layout: how many HPL elements are required?
- Post positions: where can loads be transferred safely into the ground?
- Substructure: which profiles or battens will support the sheets?
- Sheet thickness: which thickness suits the panel size and support?
- Joints: where is movement clearance needed?
- Ground clearance: how will sufficient distance from the ground be maintained?
- Wind load: what load results from the closed surface?
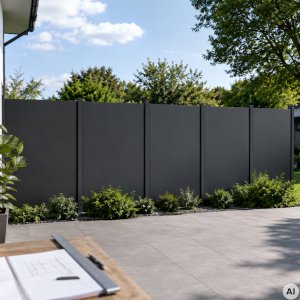
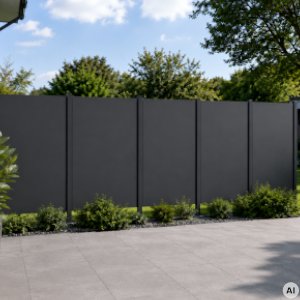
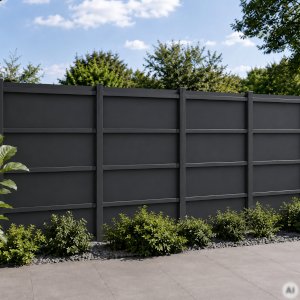
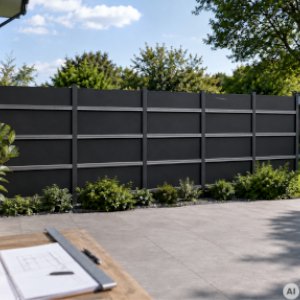
The images show examples of panel layout, joints, ground clearance and rear support.
Important: check all local requirements before planning. Permitted height, boundary distances and planning permission may depend on local regulations, the development plan and the property situation.
Different structural and safety requirements apply to HPL cladding on balcony railings. This application is covered separately in our DIY guide to balcony cladding with HPL sheets.
Choosing a substructure for an HPL privacy screen
The substructure is the supporting framework behind or between the HPL elements. Depending on the design, it comprises posts plus profiles or battens to which the sheets are fastened. These components must safely absorb and transfer all forces.
| Substructure | Advantages | Points to consider |
|---|---|---|
| Aluminium | Dimensionally stable, weather-resistant and suitable for straight structures | Profile cross-section and connection to the posts must suit the loads |
| Timber | Easy to work and suitable for traditional DIY structures | Requires suitable exterior timber, constructive wood protection and straight installation |
| Metal/steel | Allows very rigid frames and post structures | Requires durable corrosion protection and a suitable connection system |
A well-built timber substructure can be practical for a smaller patio screen. Aluminium profiles are easy to align precisely for a long, straight screen. Steel is useful where a very rigid frame is required.
Material alone does not determine stability. Profile cross-section, post spacing, connecting elements and anchoring must suit each panel.
Our guide to fastening HPL sheets explains which screws or rivets suit timber, metal and aluminium and how to install them.
Planning panels and support
The free area between supporting components is crucial for sizing the screen. The farther apart profiles or battens are, the larger this unsupported area becomes.
Wind can press the sheet against the structure or pull it away. A larger free panel with less support places higher demands on both sheet and substructure.
Additional supporting profiles reduce the unsupported area, but must themselves be sufficiently strong and securely connected to the posts or frame.
Why several privacy panels are often practical
A long screen need not use the fewest possible, very large sheets. Several distinct panels offer practical advantages:
- Sheets are easier to align and install.
- Sheet joints and movement joints can be positioned deliberately.
- The substructure can be tailored to each panel.
- Damaged elements can be replaced individually.
- Very large continuous sheet surfaces are avoided.
Do not select large panels only because a maximum sheet size is available. The complete structure must be suitable for that panel size.
Fixed standard spacings for posts or profiles would be misleading. Required support depends on sheet format, thickness, construction and actual load.
Planning tip: first define the post and profile or batten grid. Once these dimensions are known, order the HPL sheets for each panel through our cut-to-size HPL service.
Accounting for wind load and stability
The larger the closed HPL surface, the more wind force the whole construction must withstand. Unlike an open fence, wind cannot pass through large gaps.
Depending on its direction, wind presses the sheet against the substructure or pulls it away. The complete screen, not only the HPL sheet, is loaded.
Forces travel from the sheet through its fasteners into the substructure, then to the posts and finally through their anchors into foundations or load-bearing ground.
All components must work together
- HPL sheet: thickness and panel size must suit the support.
- Fasteners: quantity and arrangement must suit format and load.
- Substructure: profiles or battens must absorb the forces safely.
- Posts: cross-section, material and spacing must suit the wind load.
- Post anchoring: forces must be transferred safely into the ground.
Location, terrain, height and screen size greatly affect the actual wind load. There is therefore no universal maximum post spacing or foundation size.
Important: larger closed surfaces, exposed locations or uncertainty about posts and anchoring require professional calculation. Never size a closed HPL screen on appearance or a rule of thumb alone.
Planning joints and ground clearance
In addition to load-bearing capacity, an HPL sheet needs movement clearance. Temperature and environmental changes can alter its dimensions slightly. Do not clamp it tightly between posts or place it directly against an adjoining element.
A thermal-expansion calculation for plastic sheets can provide a rough estimate of how much an HPL sheet may lengthen or shorten for a given temperature change.
Movement clearance between panels
Leave sufficient space between adjoining HPL elements and rigid parts to accommodate minor dimensional changes. Required joint width depends on sheet format, installation and mounting system.
Mechanical systems using fixed and sliding points must also allow movement at the fasteners. One fixed point locates the sheet; all other fasteners act as sliding points.
Our specialist guide to fastening HPL sheets explains the technical details.
Provide ground clearance
The lower edge must not end in soil or remain in standing water. Clearance allows rainwater to drain, reduces permanent dirt and makes cleaning easier.
The exact distance depends on the terrain, construction and use. Water must drain freely and the sheet must not remain in contact with soil or standing water.
What is needed for an HPL privacy screen?
The components and tools depend on the chosen construction. A typical free-standing screen requires:
- HPL sheets: cut-to-size elements in the planned thickness, colour and size.
- Posts: suited to height, panel width and load.
- Substructure: profiles or battens of aluminium, timber or suitable metal.
- Fasteners: screws or rivets suited to the substructure.
- Anchoring: suited to post and ground, such as base plate, post support or foundation anchor.
- Measuring and alignment tools: for example a tape measure, spirit level and positioning aids.
- Machining tools: only if sheets must be drilled or adjusted on site.
Select the actual posts, profiles and anchors for the specific privacy-screen construction.
Preparing HPL sheets for the project
Once posts, substructure, panel layout and joints are fixed, determine the final sheet dimensions. Rectangular panels can be ordered in the required length and width, avoiding large-format cutting on site.
We guarantee a dimensional tolerance of ±1 mm for cut sheets. Individual contours, cut-outs and recesses can be produced by our CNC milling service. Our CNC machines achieve a production tolerance of approximately ±0.3 mm on the X and Y axes.
If sheets require adjustment on site, see cutting, sawing and routing HPL sheets. Information about fastening holes is available in drilling HPL sheets correctly.
Tip: define the final hole pattern only after the supporting profiles or battens are actually in place, so differences between planning and construction can be accommodated.
Building an HPL privacy screen step by step
Once panel layout, substructure and sheet dimensions are set, build the screen in a clear sequence.
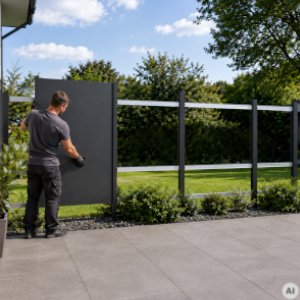
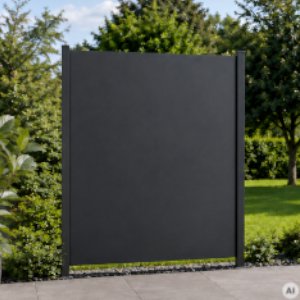
The images show alignment of the substructure, positioning of the first sheet and a completed panel.
1. Mark the line and post positions
Mark the intended line and transfer the planned post positions. Check total length and panel layout before anchoring.
2. Anchor the posts securely
Install the posts using the intended anchors. Check alignment, spacing and plumb carefully because errors affect every panel.
3. Install the substructure
Connect the posts using the specified profiles or load-bearing members. Profiles or battens must align accurately. Correct irregularities in the substructure; do not force a sheet against a crooked frame with screws or rivets.
4. Check actual panel dimensions
Measure the completed substructure again and check sheet sizes, joints and ground clearance. Only now define final dimensions for sheets not yet ordered or requiring adjustment.
5. Prepare and align the HPL sheets
Prepare the fastening points for the mounting system. Position the first sheet with the planned clearances from the ground, adjacent elements and rigid parts.
DIY tip: complete the first panel and carefully check height, joint and alignment. Use it as a reference for the remaining panels.
6. Fasten the HPL sheets
Use a system suited to the substructure and preserve the intended movement. Do not clamp the sheet between posts or distort it by overtightening fasteners.
Full details are provided in our guide to fastening HPL sheets.
7. Install the remaining panels
Install the remaining panels with even joints and a consistent height. Small deviations become obvious across a long fence.
8. Inspect the complete structure
Check posts, anchors, substructure and all sheet fasteners. Panels must not be clamped between rigid components and all movement clearances must remain available.
Common mistakes with HPL privacy screens
- Panels are too large: larger surfaces increase wind exposure and load.
- Considering thickness alone: even thicker sheets need an appropriate substructure.
- Choosing posts by appearance: posts must safely absorb the forces.
- Unsuitable anchoring: even strong posts need secure anchoring.
- Misaligned substructure: never force sheets onto an uneven frame.
- No movement joints: do not clamp sheets between rigid components.
- No ground clearance: do not leave the lower edge in soil or standing water.
- Measuring too early: check the post and profile grid before defining final dimensions.
- Ignoring local rules: height, position and boundary distances may be regulated.
Inspecting and cleaning an HPL privacy screen
The closed HPL surface is easy to maintain and can generally be cleaned with water, a soft cloth or sponge and, where necessary, a suitable mild cleaner. Avoid abrasive products and scouring pads.
Also inspect posts, anchors, substructure and fastening points periodically for visible changes, corrosion, damage or unusual loosening.
Build your own HPL privacy screen: key points
Plan the screen as a complete structure. In addition to sheet thickness and format, panel layout, substructure, wind load, posts and anchoring are crucial.
For larger elements, 8 mm HPL is often the logical choice; smaller or more closely supported panels may use 6 mm. This does not establish a universal panel size or post spacing.
Whether building a free-standing screen, a fence beside a patio or a garden wall, plan the posts and substructure first, then determine the actual panel dimensions and account for movement joints and ground clearance.
Once post spacing and panel dimensions are known, configure suitable cut-to-size HPL sheets for each panel.
Frequently asked questions about HPL privacy screens
Can HPL sheets be used as a garden privacy screen?
Yes. Compact HPL sheets rated for outdoors can form closed privacy panels in a garden or on a patio. The substructure, posts and anchoring must suit the panel size and wind load.
Can I build a free-standing HPL privacy fence?
Yes. Individual sheet panels can be fitted between load-bearing posts. Because the closed surface catches wind, posts, substructure and anchoring must suit the location and panel sizes.
Is 6 or 8 mm HPL better for a privacy screen?
6 mm is primarily for smaller or closely supported panels. For larger elements, 8 mm is often preferable because of its greater rigidity. Format, free span, support and load remain decisive.
How large can an HPL privacy panel be?
There is no universal maximum. A larger surface increases wind exposure and the requirements placed on sheet, substructure, fasteners, posts and anchoring. Size each panel for the specific construction.
Which substructure is suitable?
Depending on the design, aluminium, suitable timber or corrosion-protected metal may be used. Profiles, posts and connections must provide adequate strength and rigidity for all loads.
Why is wind load particularly important?
HPL forms a largely closed surface. Wind can press it against the structure or pull it away. These forces must be transferred safely through fasteners and substructure to the posts and their anchors.
Does an HPL privacy screen need ground clearance?
The sheet must not end in soil or remain in standing water. Sufficient clearance permits drainage and simplifies cleaning. The exact distance depends on the installation.
Is HPL suitable for a privacy screen around a pool?
Outdoor HPL sheets can screen a pool or garden area. The sheet must not remain in standing water, and the substructure and fasteners must be suitable for outdoor use.
Does an HPL privacy screen require planning permission?
Whether permission is required and which height or boundary distances are permitted depends on the location and local regulations. Check planning rules, local requirements and neighbour law before installation.
Category Anwendungstipps
- Avoid root damage by using root barriers
- Bonding acrylic glass – adhesives, preparation and instructions
- Build your own acrylic glass aquarium: planning, cutting & bonding
- Buy weatherproof and waterproof panels for outdoor use
- Cladding a roof overhang with aluminium composite panels – modern, durable and easy to install